An in-depth write up on key digital audio terms with explanations of how they work.
You’ll notice when you’re working within a digital audio software, there’s often options to change sample rates and bit depth. Both of these change the quality of audio that is created and recorded within your DAW. With processing power reaching new heights, plus the use of external DSP boxes (like Universal Audio’s interfaces) digital audio quality running at 192 kHz/32-bit floating point is becoming standard in audio engineering, and in this article we’re going to look at some key digital audio concepts in detail including sample rates, aliasing, bit depths and dither. Some of the information in this article are pretty tech-heavy and you may have to read this a couple of times to fully grasp the concepts in here but it will benefit your understanding of what goes on under the hood of your DAW.
Summary:
- Sample rates are the amount of times per second an audio signal is sampled and is measured in Hertz (Hz)
- Aliasing occurs when audio being captured is more than half the current sample rate and will create unwanted audio frequencies that reflect back from the Nyquist limit.
- The larger the bit depth, the larger the signal-to-noise ratio or dynamic range available to be represented, with 32-bit floating point the ideal candidate for all digital audio applications.
- Dithering is the process of adding low-level noise to an audio signal to correct quantisation errors that happen when a bit depth is shortened from 24-bit to 16-bit for example.
Never miss an update – sign up to our newsletter for all the latest news, reviews, features and giveaways.
Sample rates
Sample rates represent how many times per second (Hertz) audio is captured. At a sample rate of 44.1 kHz, a sample of where the waveform is at that particular time is recorded 44100 times per second. This is generally the lowest sample rate you can choose within a DAW due to the Nyquist theorem. The theory dictates that to accurately represent an audio signal, there must be twice the sample rate of a frequency you intend to capture. With the standard human hearing range being 20-20,000 Hz, to accurately capture 20,000 Hz, you require a sample rate of at least 40,000 Hz. This extra 4100 Hz allows for the high frequencies to have some breathing room after the low pass filtering.
With increased sample rate, higher frequencies are able to be recorded, with 192 kHz theoretically able to capture audio up to 96 kHz of audio. Now, this isn’t audio that you will be able to hear in practise, but the increased sample rate reduces aliasing effects of the frequencies beyond our hearing range.
Aliasing
What is aliasing you may ask? Well aliasing is caused by audio that is unable to be correctly represented within the sample rate. A way of visualising this would be looking at a cars wheel on camera when it is going very fast, it appears to move backwards, but we know for a fact it’s moving forward.
What happens in this instance is that the wheel is spinning faster than the capture rate of the film and to us, appears to move backwards. The same idea can be applied to sample rates when the frequency is too high for the processor to capture. This causes a higher frequency to reproduce as a lower frequency and thus becoming an alias (something appearing to be something else) of the lower frequency.
Now, recording at 44.1 kHz will be sufficient for recording live audio, although a higher rate is recommended for more information on the recorded audio, as if extra harmonics are created by outboard gear, they will be cut off by steep lowpass filters before entering the digital realm. For digital audio processing though, this is a different story.
Let’s say you record a clean vocal channel and want to beef it up by using a saturator. Some of the high frequencies when saturated may reproduce harmonics that exceed 22,050 Hz, which would result in aliasing that is unwanted. the aliasing will reflect in a linear fashion so that for every frequency over the Nyquist limit (in this case 22,050 Hz), the audio will actually reflect backwards this amount. Let’s say that the frequency of 30,000 Hz was produced by the saturator. At this sample rate, it is 7,950 Hz over our Nyquist limit and will actually create signal at 14,100 Hz [22050-7950]. Now this frequency is unwanted because chances are, it would not be a direct harmonic of the original signal and would be displeasing to the ears.
One way to escape adding aliasing to your signal path is through running your DAW at a higher sample rate or using ‘oversampling’ settings on plugins. Some FabFilter plugins have an oversampling parameter that allow you to oversample up to 32x (!) your current DAW sample rate. This does come at the expense of more DSP usage, but allows far less aliasing to occur. With their Saturn saturation plugin on Best quality, all aliasing effects are removed, which means you’re gaining the harmonic saturation that you do want from the plugin, but not the aliasing effects that reflect backwards from the sample rate and add unwanted audio frequencies to your signal.
Bit depths
Bit depths may be a bit tougher to understand for some (see what I did there). The number, which is commonly 16, 24 or 32, represents the bit length of the digital word that is used to record and process audio. At a bit depth of 16-bit, sixteen binary numbers (1’s and 0’s) are used to represent the recorded audio through turning switches on and off for descending powers of 2—i.e. the 16th bit is 2^15, the 15th bit 2^14 all the way down to the last bit which is 2^0. For instance, a binary number of 20 at a word length of 16 would look like this [0000000000010100], with each combination of 1 or 0 representing a different number. Through this system 65,536 different numbers can be dictated which allows for a signal-to-noise ratio of 96.33dB.
24-bit audio works in the same format but with 24 binary numbers in its word length and a signal-to-noise ratio of 144.49dB. Trying to replicate the same number 20 we wrote previously, the extra 8 binary digits would add onto the end of the binary word creating this [000000000001010000000000]. These numbers wouldn’t translate correctly if you just wanted the end result to equal 20 but within the context of digital audio the points on a digital audio signal are actually somewhere between 1 (full amplitude in the positive direction) and -1 (full amplitude in the negative direction). This ’20’ in regular binary information would sit somewhere close to -1 which would be similar in the 24 bit version. DAWs inherently understand this and convert the audio accordingly when working in different bit depths to be concurrent with what is actually recorded.
Where it starts to get interesting is when we hit floating point audio. This is significantly different to standard audio recording as it allows audio to actually exceed the hard zero limit of clipping in the digital space. Floating point data storage works in scientific notation with the first bit showing if the number is positive or negative, the next eight bits representing the exponent and the remaining 23 bits used for the mantissa (decimal point).
This may be beyond the reach of people who haven’t studied computer science but stick with me, to represent the same 20 we mentioned earlier in this 32-bit floating point format would look like this: [0-10000011-01000000000000000000000]. I’ve broken up the bit into segments so you can see what each part is doing, but the numbers are stored in scientific notation base 2 with 20 being [1.25×2^4]. With the first digit being zero, this represents a positive signal at [0]. The next eight digits tell us that the exponent is 2^4, where all 0’s equals -126 and all 1’s equals 128. The last 16 bits tell us the mantissa or value of digits after the decimal point. With all zeros here the output would be 1.0 and with all 1’s, it approaches two but is actually 1.999… In this instance, having the second binary digit on gives us the output of 1.25 and therefore we have created the number we initially put in.
“Yeah but why would I use 32-bit floating point?” you may ask. The answer, is that the representation of audio files has a dynamic range of 1528dB! This is far more than anyone would ever need in recording audio but the format actually allows audio that was recorded over 0dBFS to not be hard clipped. By simply turning down the recorded audio, there will be information above the previous ‘hard limit’ of computing and can allow for cleaner recording if you accidentally go over the max level.
In essence, recording in 32-bit float is ideal if your DAW supports it and if your setup can handle it. Gaining extra headroom plus never having to worry about the noise floor of the digital recording is excellent, but this doesn’t account for the signal-to-noise ratio of whatever you’re using so make sure you have a quality interface, preamps and microphones too.
Dithering
When audio is quantised (downsampled) from 24-bit to 16-bit for instance, the last eight bits (the least significant bits) get cut off, leaving only the binary digits that create the most change present. Now you might think “but I want that information”, but the reality is that by reducing the bit length, we are removing dynamic range from our productions. Luckily, there is dithering features to smoothen out these quantisation errors.
Dithering is a process that uses noise to correct quantisation issues like we just outlined. In essence, dithering adds a random element to the audio (through noise, which is just random sound), and will smooth out these errors. By adding the random noise, audio will fade out smoothly, instead of abruptly cutting off when it reaches the lowest end of the dynamic range it can reproduce, which for 16-bit is -96dBFS.
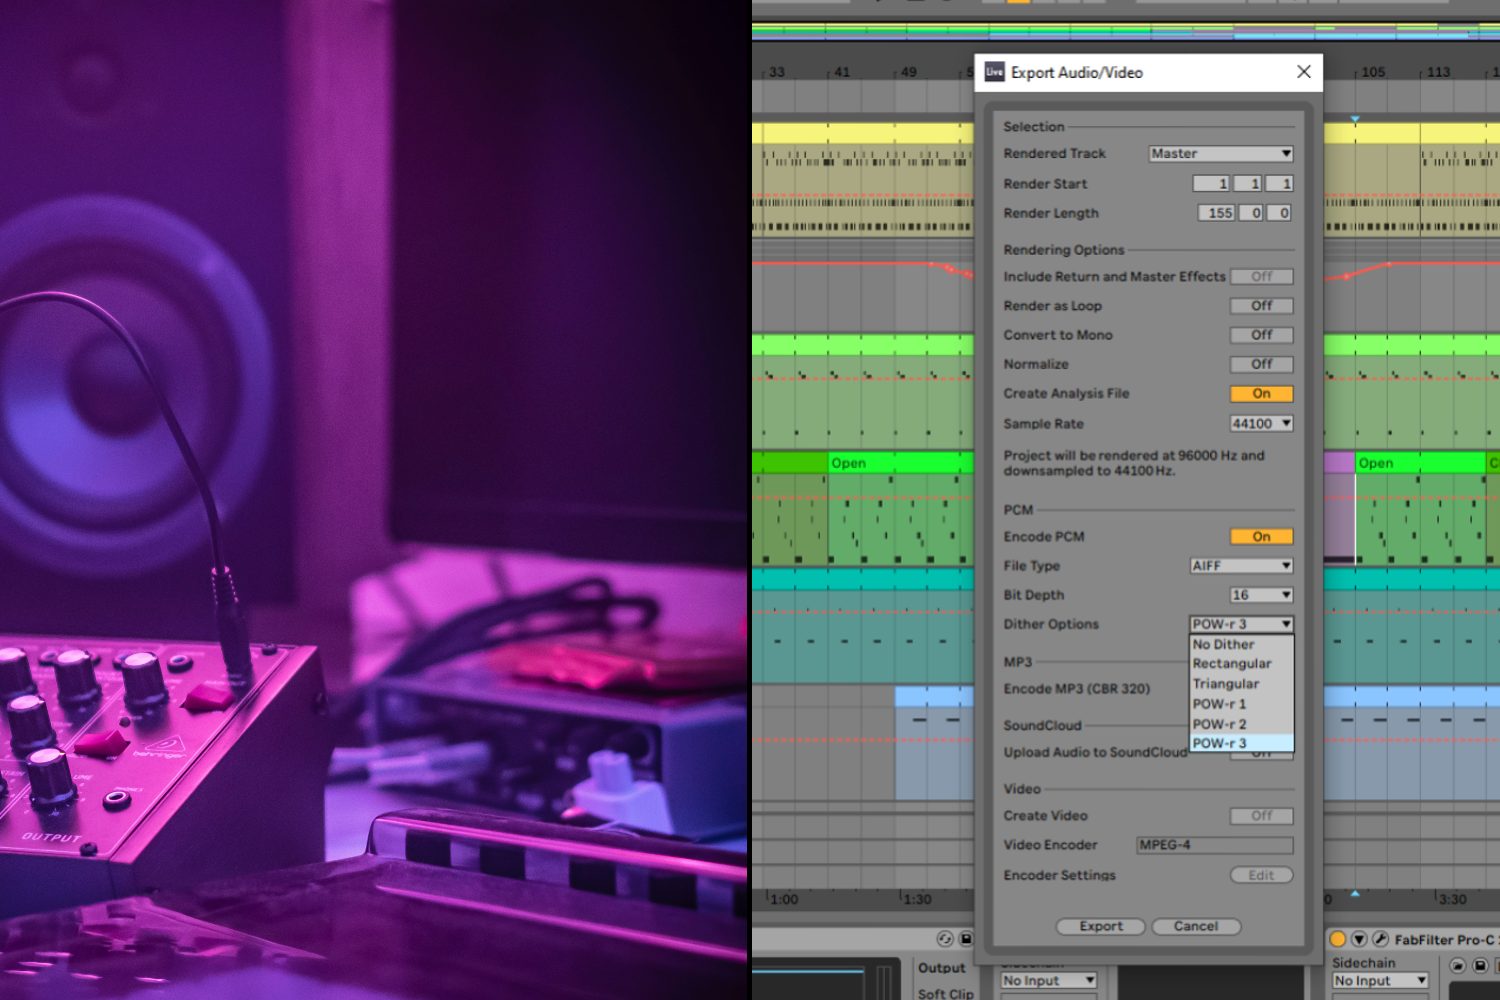
Within your DAW you’ll find a few options for dithering an audio track when you bounce it to disk. Commonly you’ll find POW-r type 1, 2, 3 and triangular dither options. Let’s start with the POW-r dither options in which type 1 uses even noise across the frequency spectrum, type 2 uses noise shaping to reduce noise around 2 kHz and increase noise above 14 kHz, while type 3 is heavily skewed towards the top end. Of these, type 3 is a great choice for most applications as the bits you are losing are likely to represent the higher frequencies and this type of dithering won’t add noise to a majority of the frequency spectrum.
Triangular dither uses a similar approach to POW-r Type 3 as it is more present around 20kHz and dips around 3kHz where our ears are most sensitive. It has been said that triangular dither is best used if the audio file has to be re-edited after the fact but realistically, no matter which one you choose, any time that you are quantising (reducing the bit depth) of an audio file you should always apply dither.
I hope this article helps you in understanding these key digital audio concepts and how they can affect your digital audio journey. To summarise, for the best quality audio, always record at the highest sample rate and bit rate you can, always use oversampling on your plugins to avoid aliasing and any time you quantise your bit depth, always dither it.
Read all the latest features, columns and more here.
