A run through of how to effectively treat your studio.
For a bit of a refresher, we’ve previously look at monitoring itself in our Monitoring Month a few years ago, we looked at setting up studio monitors and introduced some the (very) basics of acoustic treatment at the setup/room layout basic furnishing level. This was done intentionally to prepare you for which brings us to our next point of discussion, the colossal worm hole that is the science of acoustic treatment.
When we say acoustic treatment within the context of a studio environment, we are referring to the treatment of sound within a room, as opposed to acoustic isolation (sound proofing), which is another wormhole in and of itself.
Acoustic treatment certainly isn’t going to alleviate any disgruntled neighbours complaining about the thumping low end emanating from the home studio next door. Whilst it might sound great and well balanced inside a meticulously treated room, sound can still escape into the outside world, sorry folks.
Now that we’ve discerned those two sometimes confused terminologies, let’s crack on.
Summary:
- Every studio is different with regards to their acoustic properties and feature room modes that will create build ups and absences of specific frequencies.
- Calculating room modes of your studio allows you to understand which acoustic treatments you should install and where it should be placed.
- A combination of bass traps, broadband absorbers, diffusers and resonators will help you achieve a treated studio space which will improve your monitoring ability significantly.
Read up on all the latest interviews, features and columns here.
The What, Where and How of Acoustic Treatment
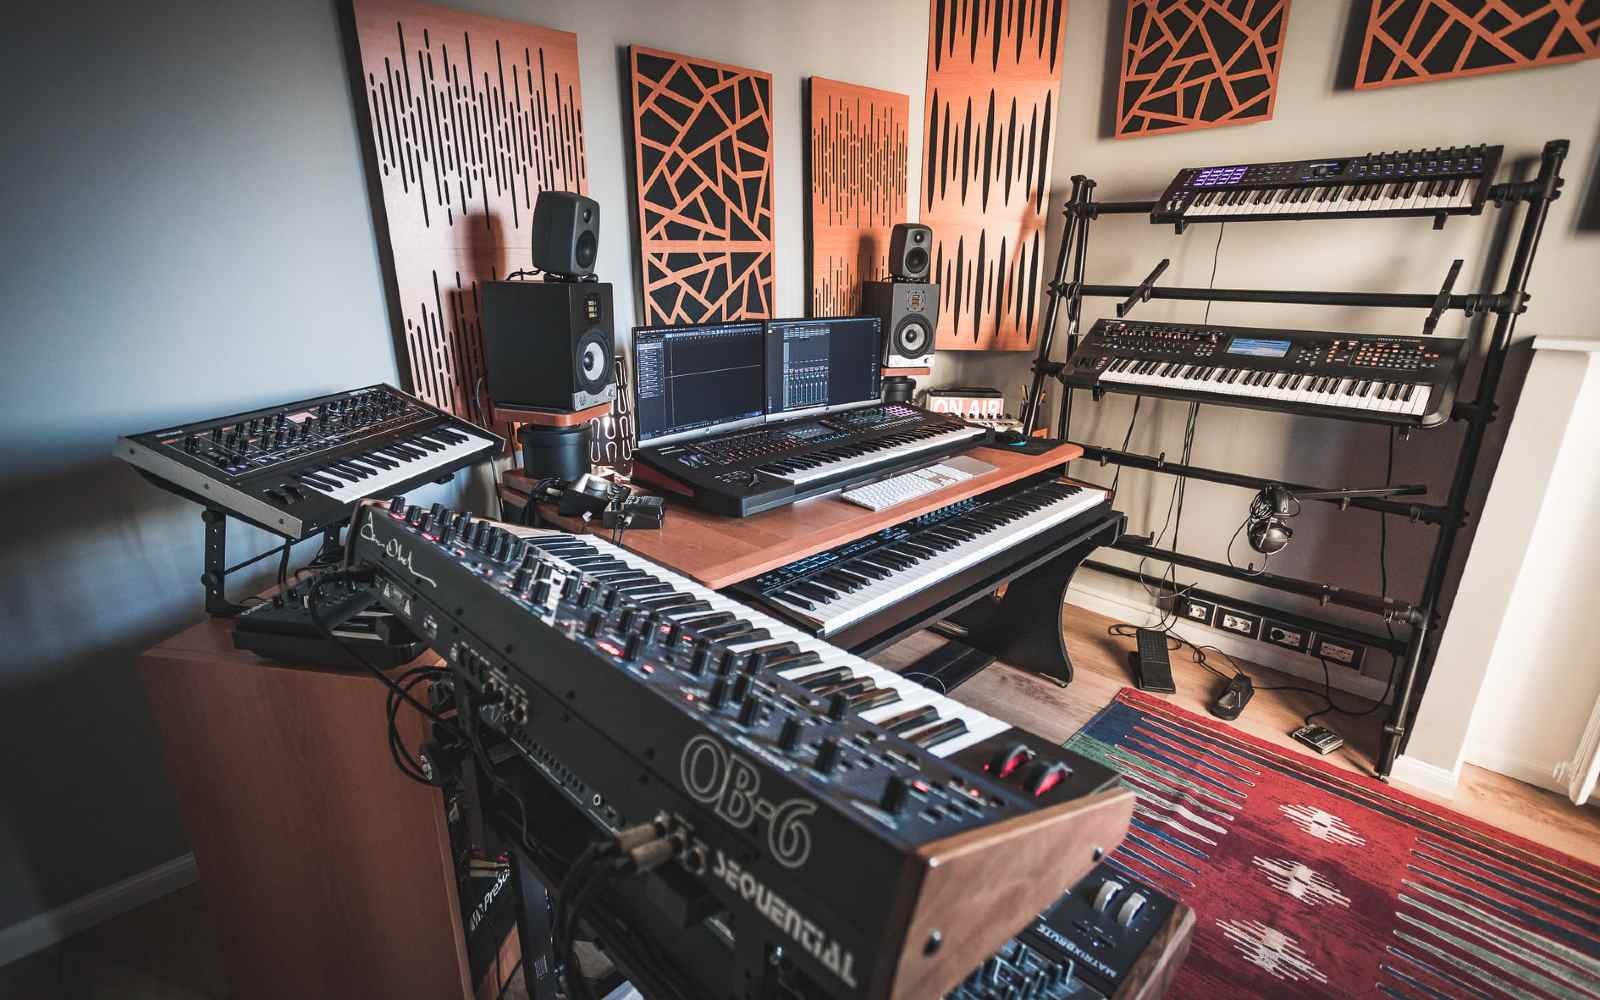
After our last instalment, we are assuming that our studio is now all measured up, with monitors optimally placed within the dimensions of the room, creating a beautifully symmetrical equilateral triangle from the the mix position, ie we are positioned at roughly 38% of the room length.
Our monitors are placed on stands, thus separated from our studio desk and on top of this, we have also further decoupled from the stands themselves by using something along the lines of a Primacoustic recoil stabilizer or IsoPad to create some separation between surface, stand and speaker.
With all these bases covered, we’re in optimum territory to attack the ‘treatment’ of the room. But before we start busting out the amassed assortment of egg cartons (the most legendary acoustic treatment myth of them all), what exactly are we trying to do here?
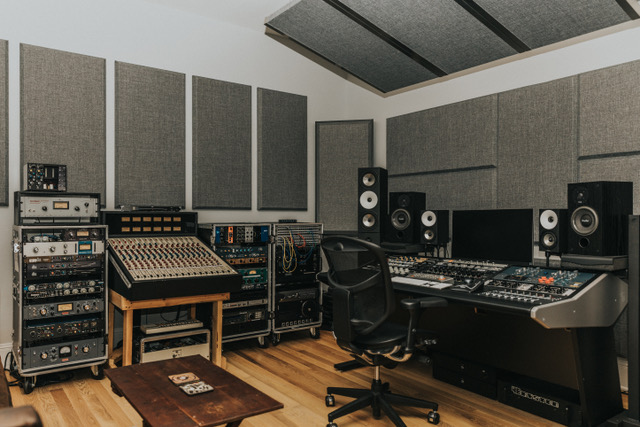
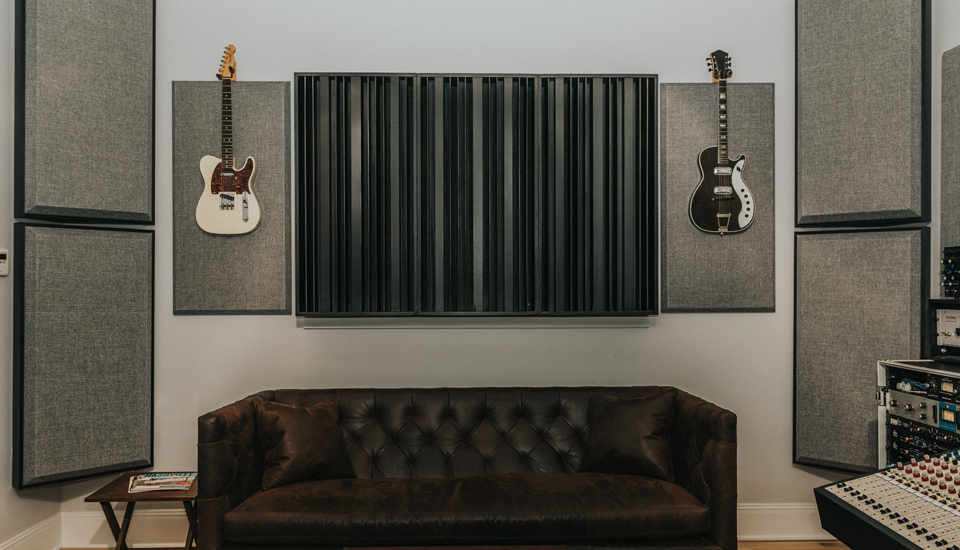
Sound absorbing panels
Every single room in the known universe (with maybe an anechoic chamber being the only exception) has a specific set of room modes, and these are determined by the specific dimensions of a room. But you may ask yourself, what is a ‘mode’ and why should I care?
In the context of studio monitoring, the room is more than just an arbitrary space in which to set up our equipment. Like a giant, sealed speaker cabinet or massive instrument body, our room itself carries it’s own unique set of resonances and innate frequency characteristics that in turn directly inhibit our ability to accurately perceive sound, thus pushing us further away from this gold standard of 100% accuracy at the monitoring position.
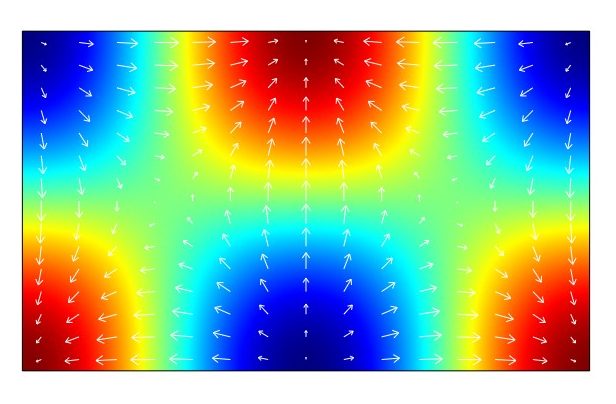
Of these aforementioned resonances, the most influential and obvious to identify are the room modes-the collection of trouble frequencies that are etched into the very physics and design of the room itself. These are completely dependent on the dimensions of the room and can be identified before we even step foot in our space, so long as we know the length, width and height of what we are walking into.
These Room Modes are part of the sonic profile of our listening space and in turn have a massive influence on how we perceive sound therein, causing peaks and dips in frequency response when the room is excited by an acoustic source such as a loudspeaker. To put it simply, Room modes are unavoidable and almost always inherently problematic, so it’s important to identify and treat the worst of them wherever we can.
But how do we identify them? Well first it’s important to note that Room modes are broken down into three types: axial, tangential and oblique.
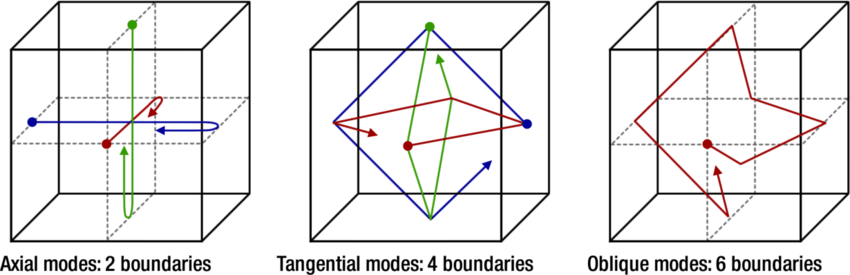
Axial modes are the most dominant and occur between a pair of parallel surfaces, (such as the front/back walls of a room and so on). Tangential modes occur between two pairs of parallel surfaces (eg the front/rear and the side walls) and measure half the intensity of axial modes. Lastly, oblique modes occur between three pairs of parallel surfaces (front/rear, sides and ceiling/floor) and are a quarter the intensity of axial modes.
Looking at the most intense of these modes, the frequencies of the first axial modes are directly proportional to the dimensions of a room, equating to double the length of each of dimension. A basic understanding of what these modes are will takes us a long way to understanding where and how we can begin treating them.
For example, let’s take a room with the following dimensions, length = 4m, width = 3m and height 2.5m. The first axial mode (1-0-0), which in this case is going to be the length of the room (as it’s the longest dimension) will have a wavelength of 8 meters. We can calculate the frequency of this wavelength by using the formula ƒ = v/W (frequency = velocity divided by wavelength).
Assuming our velocity is 344 m/s (the speed of sound at at 21 Celsius), the first axial mode should be 43Hz. Continuing with this example and utilizing the frequency formula, our second axial mode (0-1-0) is going to be 57Hz (the width dimension) and our third (0-0-1) is going to be 68.8Hz (the height dimension). From calculating the first axial modes, all other axial modes (harmonics of first axial modes), as well as the tangential and oblique modes can be calculated. Compiling this information can give us a greater understanding of the acoustic issues that need to be addressed within a specific room, so let’s look treatment types.
Bass Traps
You’ve no doubt either heard of these devices or have guessed what they do. Yep, they trap bass and low end. The build up of low end is particularly prevalent and problematic in smaller rooms. This is because these room modes fall within our auditory range and can pile up quickly. As discussed earlier, because the room dimensions are smaller than that of a sound wave itself, they reflect between parallel surfaces and are either reinforced (creating a peak) or cancelled out (creating a null or dip).
This gives a distorted acoustical representation of that particular frequency within the room and if left completely untreated can be a potential hindrance to a mixing environment. Using bass traps significantly helps control these lower frequencies freely bouncing around a room and getting out of hand.
Generally, the corners of a room are where the most amount of low end energy builds up, because it is where maximum pressure and minimum velocity meet at 90 degrees. By placing bass traps in these spots is a great place to start to help tame low end energy building up. Unless you’re keen to get the tools and calculator out and attempt making your own, pre made bass traps are the way to go but can be expensive.
Primacoustic
The reason being is there’s some pretty intense mathematics involved in calculated the acoustical absorption coefficient of particular materials, so professionally manufactured bass traps are specifically designed to help absorb frequencies below 100Hz and generally absorb up to the lower mid-range (200Hz – 300Hz, depending on the design and manufacturer). Something like Primacoustics ‘London’ broadband bass traps are an awesome option and worth every penny, given how important bass traps are to the grand scheme of things.
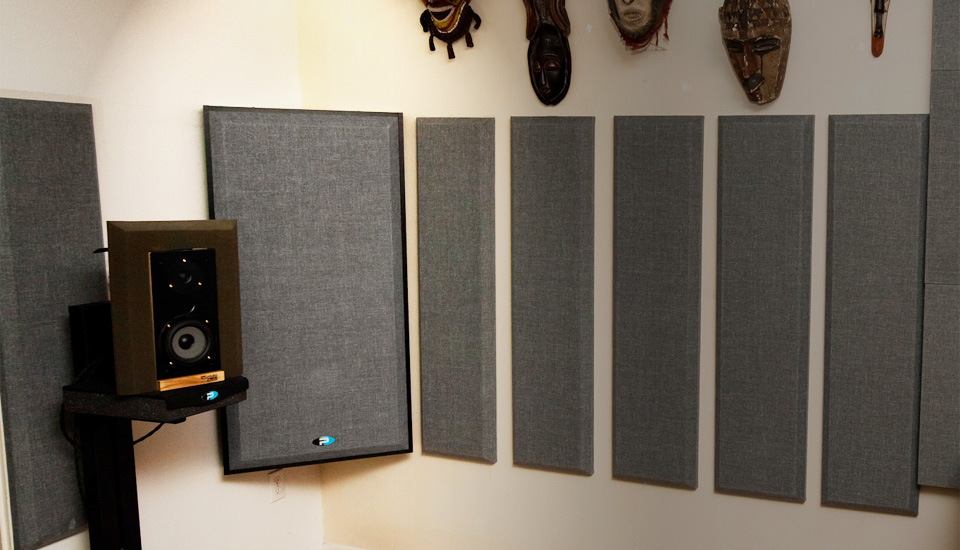
Broadband Absorbers
These cover a wider range of frequencies and are great for controlling frequency reflections in the midrange and upwards. Broadband absorbers can either be purchased pre made (with many different options available), or with a bit of know how, you can make them yourself by making a simple wooden frame, purchasing some Rockwool or similar material and some breathable fabric. However, like bass traps, unless calculating the absorption rates of the materials you’re using, knowing exactly what frequency range you’re absorbing is going to be a little ambiguous, but still effective.
A handy trick with knowing where to place these absorbers is by simply using a mirror. From your mix position, reach out and place a mirror in front of your monitors respective tweeters. Looking directly into the mirror you should see yourself and some of the wall behind you. The pieces of wall you can see in the mirror is where you want to place absorption. Having acoustic treatment in these areas is going to take you a long way in helping control reflections bouncing back at you.
This same trick can be applied around the room too. Have someone take the mirror and move it along the side walls. Anywhere you can see your monitors in the reflection is a spot to place an absorber. Simple. This also includes the ceiling of your room, which can often be forgotten about, but is of equal importance. The space directly above your mix position is the most significant and when absorption is correctly placed will create the reflection free zone, or RFZ. This means that all the boundaries surrounding your mix position are acoustically treated, thus minimizing early reflections to this location and in turn giving a more even and accurate frequency response.
Another trick with maximizing the lower frequency absorption with a broadband absorber is utilizing the quarter wavelength rule. Based on this acoustical rule, placing absorption at this point from a wall boundary can maximize absorption. Obviously in smaller rooms this can be limiting and isn’t practice to place an absorber 30cm out from a wall, but even 5cm -15cm out from a wall can be helpful.
Audio diffuser
Instead of having frequencies bouncing off a surface and straight back at you or being absorbed by a bass trap or broadband absorber, diffusers help breakup and scatter frequencies randomly around the room. Whilst this might sound chaotic, it’s very helpful in dispersing frequency energy and build up, giving a room acoustical life, without a build up of problems. Diffusers typically come in two design types, Reflection Phase Grating (RPG) or a Quadratic Residue Diffusor (like the Primacoustic Razorblade QRD diffusor for example).
Diffusers involve some complex mathematics to precisely calculate the well depths (and corresponding frequencies) being diffused and are therefore the most expensive of the sound treatment members. If getting a professionally made diffusor isn’t in the budget, a book shelf can somewhat mimic the effect. The different heights, depths and thicknesses of books can help randomize sound waves that interact with them, so getting creative with how books are displayed in a repurposed bookshelf diffusor is the aim of the game. A good spot to place a diffuser is against the back wall directly being your mix position, helping scatter and randomize frequencies bouncing back to the mix position.
Resonators
Probably the least common of acoustic treatment, the Helmholtz resonator can be a great solution for absorption of a specific lower frequencies bands, in a narrow spectrum. Based on the principle phase reversal, resonators interact with an incoming frequency band, causing it to oscillate and reemitting those soundwaves in reversed phase, thus attenuating the frequencies. These can be cylindrical in shape and be suspended in an absorber or a freestanding device. Much like bass traps and diffusors are more expensive and require complex mathematics to calculate the targeted frequencies.
Final Thoughts
Obviously, it’s easy to go over board with acoustic treatment. Completely deadening a room isn’t what we’re trying to achieve here, as we don’t enjoy listening to music this way, how unexciting. We still want to have acoustical “life” in our studio, and if we deaden a room too much we’re likely to unwittingly add unnecessary amounts of top end back into our mixes because of what we’re hearing (or more to the point not hearing) in our room.
A perfectly acoustically treated room simply doesn’t exist—with perhaps George Massenburg’s Blackbird studio room being the only close exemption here—so there’s always going to be a level of compromise and anomalies in every studio space. Being aware of what these imperfections are and training our ears to recognize them is key. Experiment and refine your approach to strike a desirable balance of absorption and life in the studio that works for you.
For acoustic treatment for your studio, check out the Primacoustics range of professional products.