The things you’ll need, the things you’ll want, and the things you simply can’t do without.
Over the years, I have put together several home studio setups for myself in different spaces and with different technologies. Some of us began recording audio onto Super VHS from a mixing console with a range of synthesisers and microphones. The late ‘90s allowed computer audio recording to become a viable option for a home studio, even though you were lucky to get two inputs and a personal loan that made your HECS debt look like a casual investment.
Read all the latest features, columns and more here.
Things have certainly developed considerably since those days. My need for a 32 channel in-line mixing console in the home studio eventually faded away with more and more processing happening within the machine. Now, having the perfect home studio setup is about minimising space and improving workflow to allow for a focus on quality, while also ensuring you have a space that’s treated. Before you can think about any of that, you need to ensure you have the means to commit to constructing the space of your dreams that in mind, let’s look at how today’s signal chain can work for you.
Computer
It has to be noted that the developments in computer technology really have made home recording what it is today. You can have just as much power at home in a machine as they use in a professional studio, and it also goes without saying that Mac has certainly been the go-to machine for most audio industry professionals over the years. So, in the interest of keeping the desktop clutter down, and the ability to go mobile with your recording and editing, it makes sense to base your home recording setup around a MacBook Pro for power and flexibility in your DAW.
These days, a new machine like this costs less than the audio interfaces we used to use to get sound into our machines 25 years ago, so it makes sense to invest in a solid workhorse. This is going to handle your recording and editing and with a host of quality plugins available these days for your chosen software, you want plenty of grunt under the hood to keep up with the multi-channel audio processing you intend to do. Of course, as is always the way, when you upgrade your machine, the ability to access more processing power usually results in your abusing more plugins and chewing it all up again. In short, when it comes to computers and audio, plan ahead both in storage or RAM capabilities. A couple of hundred dollars extra at the start might save you thousands down the line for the sake of a couple of extra RAM slots.
MIDI instruments
As far as getting your sound recorded, a combination of MIDI instruments within your DAW of choice and recording from a microphone will provide plenty of versatility. Without going mad and diving into a serious microphone or keyboard collection, you can get a lot done with just a couple of items. A USB MIDI controller keyboard makes controlling your software instruments a breeze. You just need to figure out what size best works for the space you’re recording in. But, if it’s just for playing simple melody or bass lines into the software, a smaller-key model can easily be shifted up and down the octave range and saves on space.
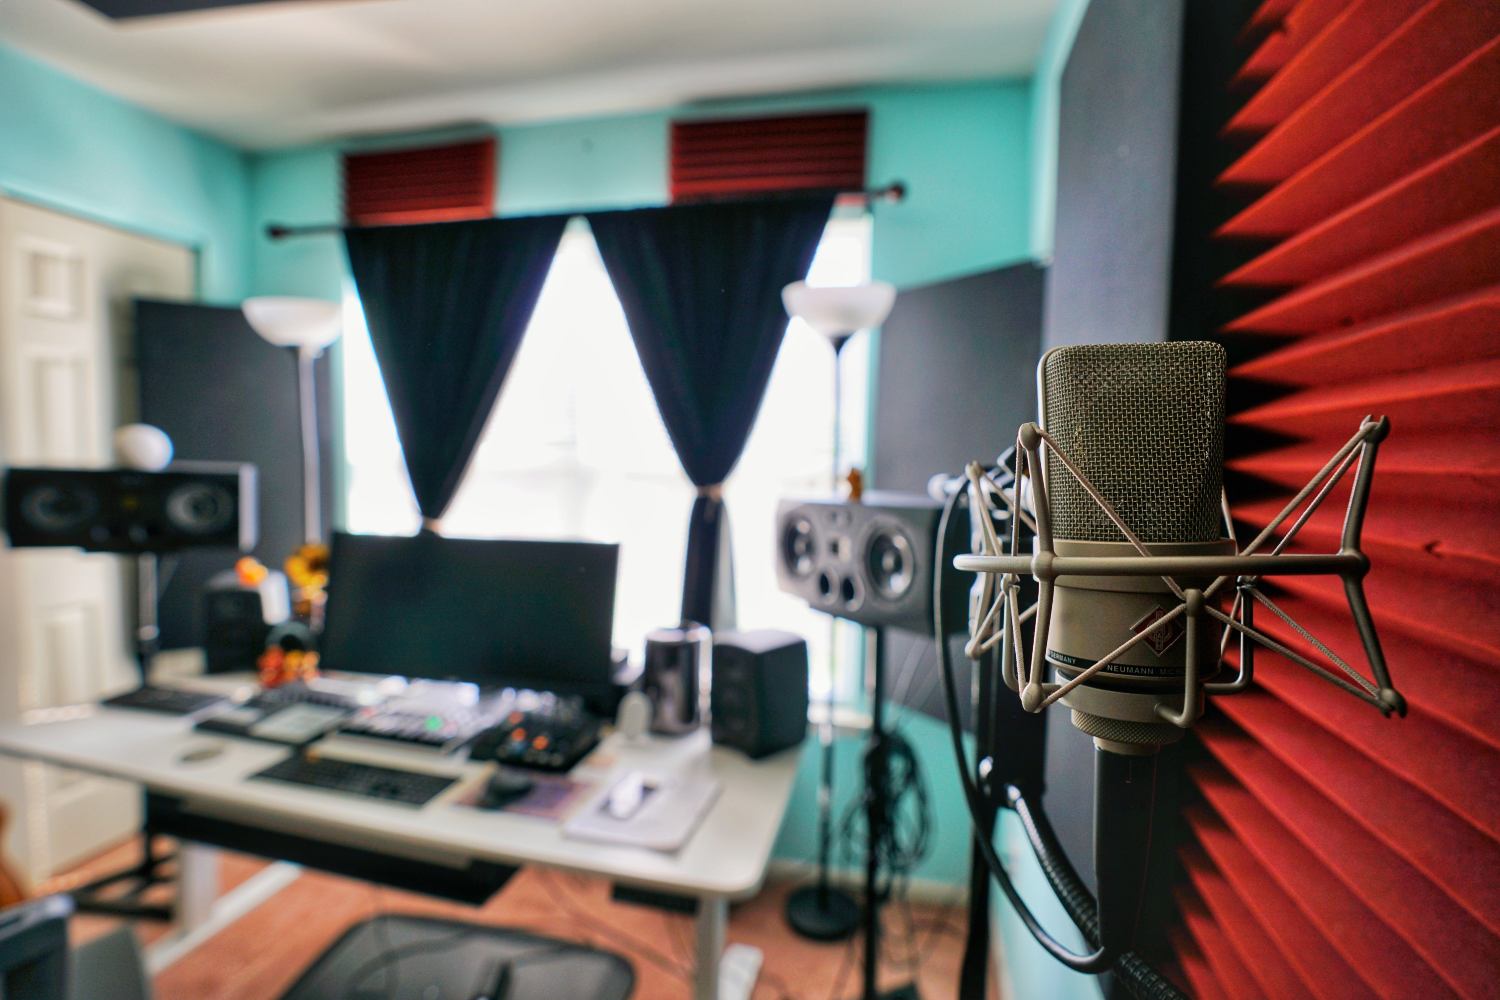
Microphone
Then, for recording, one microphone that does pretty much anything is ideal. Simplifying this stage of the recording signal flow means you can focus on performance and not on technical issues. A dynamic microphone is something to take into consideration, so it isn’t that sensitive that it will pick up all of the environmental noise around your home studio, but it will pick up your vocals with great clarity and excellent warmth. It would work well on instruments too, including guitars and percussion as they can often handle a high sound pressure level with ease.
Interface
Now, getting the sound into your software is the next consideration. While it’s all well and good to run a large format mixing console and a multi-channel interface capturing each channel strip from your desk, this is often unnecessary in many home recording setups. This will all depend entirely on the kind of music you are making. For many working in the box or with electronic music, a couple of good input channels are usually all that is needed, with the ability to overdub or potentially track in stereo if required.
Of course, at a minimum you are going to want inputs for both microphone and line level inputs, and a Hi-Z input for running instruments directly without a DI box is also nice. An interface that also offers headphone monitoring with the mix of direct and recorded sounds able to be balanced in the cans should also be sought after. If you are recording full band or live drums, all bets are off though and your number of required inputs is going to have to be upped!
Monitoring
Speaking of cans, a pair of headphones that completely enclose the ear and reduce spill into the room are essential. So when you’re recording instruments and vocals, you won’t get the sound of playback filtering into the microphone from your headphones. They should also offer a very articulate reproduction of your sound so you get to hear a lot of what is going on during tracking, without having to rely on the tracks to be mixed and edited later on to actually hear what you need to. Headphones that are lightweight and comfortable should be high on the priority list as well because after all, you have to want to wear them.
But, when you want to really hear what you’ve been creating, there is nothing like having a good pair of studio monitors to give you an understanding of your mix. Here’s a couple of setups that for instance will suit a small home studio nicely. A pair of 5” studio monitors tied together with a sub to give a nice balance of mid and high frequencies from the 5”, with the low frequencies handled by the sub, with its built in cross-over to make sure they work in unison. Or, if you want articulation in just one pair of speakers, then something like 7” studio monitors will offer more depth with their bigger drivers, without sounding too sluggish at close range like a larger monitor can.
If you’re really keen, and space allows for it, having both setups of monitors is ideal to allow you to hear your mixes from different combinations of drivers. That would just about be a dream home studio setup right there.
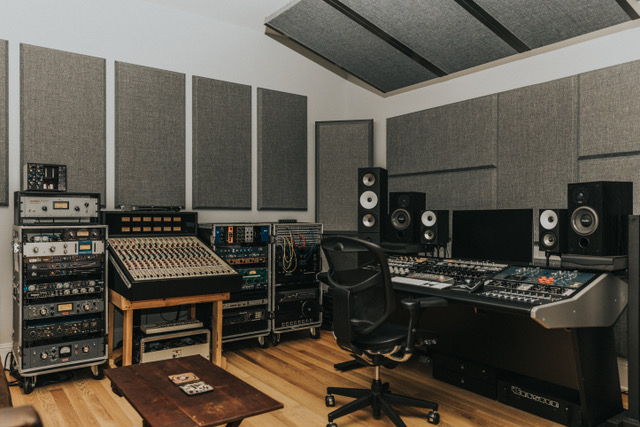
Acoustic treatment
Now, with the fun stuff out of the way, let’s talk about acoustic treatment. When we say acoustic treatment within the context of a studio environment, we are referring to the treatment of sound within a room, as opposed to acoustic isolation (sound proofing), which is another wormhole in and of itself. Either way, doing this correctly and effectively is often the difference between a ‘professional’ and an ‘amateur’-sounding home studio and as such, there is a rather hefty price tag attached to this kind of treatment to which most don’t always consider when planning a home studio.
This might be something of a controversial take, but if it comes down to treating acoustic nasties vs. sound proofing your space, treatment wins every time.
Acoustic treatment certainly isn’t going to alleviate any disgruntled neighbours complaining about the thumping low end emanating from the home studio next door, but it does mean that you are getting the most out of your space in those times that you are making noise. Conversely, while it might sound great and well balanced inside a meticulously treated room, sound can still escape into the outside world. This is the reality, sorry folks.
Assuming that our studio is now all measured up, with monitors optimally placed within the dimensions of the room, creating a beautifully symmetrical equilateral triangle from the mix position, i.e. we are positioned at roughly 38 per cent of the room length.
Our monitors are placed on stands, thus separated from our studio desk and on top of this, we have also further decoupled from the stands themselves by using something along the lines of a Primacoustic recoil stabiliser or IsoPad to create some separation between surface, stand, and speaker.
With all these bases covered, we’re in optimum territory to attack the ‘treatment’ of the room.
Bass traps
You’ve no doubt either heard of these devices or have guessed what they do. Yep, they trap bass and low end. The build up of low end is particularly prevalent and problematic in smaller rooms. This is because these room modes fall within our auditory range and can pile up quickly. As discussed earlier, because the room dimensions are smaller than that of a sound wave itself, they reflect between parallel surfaces and are either reinforced (creating a peak) or cancelled out (creating a null or dip).
This gives a distorted acoustical representation of that particular frequency within the room and if left completely untreated can be a potential hindrance to a mixing environment. Using bass traps significantly helps control these lower frequencies freely bouncing around a room and getting out of hand.
Generally, the corners of a room are where the most amount of low end energy builds up, because it is where maximum pressure and minimum velocity meet at 90 degrees.
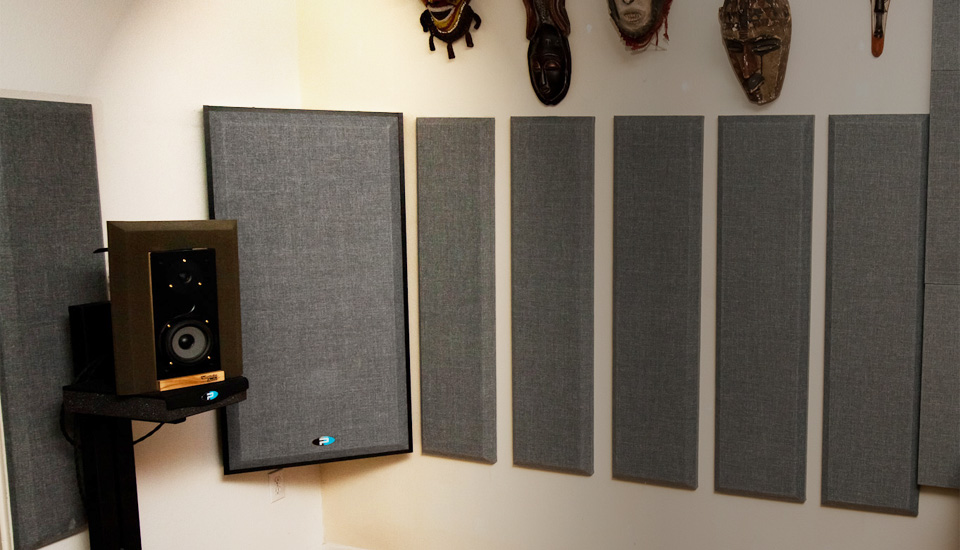
Broadband absorbers
These cover a wider range of frequencies and are great for controlling frequency reflections in the midrange and upwards. Broadband absorbers can either be purchased pre-made (with many different options available), or with a bit of know-how, you can make them yourself by making a simple wooden frame, purchasing some Rockwool or similar material and some breathable fabric. However, like bass traps, unless calculating the absorption rates of the materials you’re using, knowing exactly what frequency range you’re absorbing is going to be a little ambiguous, but still effective.
A handy trick with knowing where to place these absorbers is by simply using a mirror. From your mix position, reach out and place a mirror in front of your monitor’s respective tweeters. Looking directly into the mirror you should see yourself and some of the wall behind you. The pieces of wall you can see in the mirror is where you want to place absorption. Having acoustic treatment in these areas is going to take you a long way in helping control reflections bouncing back at you.
Diffusers
Instead of having frequencies bouncing off a surface and straight back at you or being absorbed by a bass trap or broadband absorber, diffusers help breakup and scatter frequencies randomly around the room. While this might sound chaotic, it’s very helpful in dispersing frequency energy and build up, giving a room acoustical life, without a build up of problems.
Diffusers involve some complex mathematics to precisely calculate the well depths (and corresponding frequencies) being diffused and are therefore the most expensive of the sound treatment members. If getting a professionally-made diffuser isn’t in the budget, a book shelf can somewhat mimic the effect. The different heights, depths and thicknesses of books can help randomise sound waves that interact with them, so getting creative with how books are displayed in a repurposed bookshelf diffuser is the aim of the game. A good spot to place a diffuser is against the back wall directly being your mix position, helping scatter and randomise frequencies bouncing back to the mix position.
Resonators
Probably the least common of acoustic treatments, the Helmholtz resonator can be a great solution for absorption of specific lower frequency bands, in a narrow spectrum.
Obviously, it’s easy to go overboard with acoustic treatment. Completely deadening a room isn’t what we’re trying to achieve here, as we don’t enjoy listening to music this way, how unexciting. We still want to have acoustical “life” in our studio, and if we deaden a room too much we’re likely to unwittingly add unnecessary amounts of top end back into our mixes because of what we’re hearing (or more to the point not hearing) in our room.
A perfectly acoustically treated room simply doesn’t exist – with perhaps George Massenburg’s Blackbird studio room being the only close exemption here – so there’s always going to be a level of compromise and anomalies in every studio space. Being aware of what these imperfections are and training our ears to recognise them is key. Experiment and refine your approach to strike a desirable balance of absorption and life in the studio that works for you.
Now that you have the minimum setup required to start tracking and mixing effectively, what you do from here is up to you!