Increasing productivity and opening up advanced features by mapping the grid
*In this article any Key Commands will appear within square brackets [xxx] for Mac Only*
Most, if not all, DAW software these days allows for the timing of tempo and differing time signatures to be freely edited in order to follow the real-time performances of the recording artist(s). Whether the piece is a constant tempo or variable, this is still the first stage of actual editing that I undertake, regardless of the style of the project.
Many engineers are simply unaware that mapping the grid to a real-time performance not only increases the productivity during the mixing process but also opens up a whole raft of advanced features in the DAW environment. In the current trend of laying loops alongside real performances and samples atop real acoustic sounds, this timing reference is an absolute imperative for the engineer.
Read all the latest features, columns and more here.
I will introduce my methods for grid mapping before expanding upon the vast options and features that are made possible and more accessible once a timing grid is in place.
May I firstly point out that this is of equal importance to a set-tempo production as it is to real-time variable pieces, for the click-track is merely a metronome to which the recorded performer refers to; it is absolutely not a corrective measure and nor would we want a real-time performance to be completely quantised or corrected. Therein lives the feel and indeed, the groove.
The kit
If we are to take most contemporary productions as the prime example when investigating the time keeper within a piece, it is very likely the drummer. A drum kit is a collection of different percussion instruments arranged in a manner that allows for one person to play each of them simultaneously, but also deems that recording just a single drum is essentially impossible as they are all too close together to obtain true separation.
What junior engineers often fail to realise is that a drummer is not a drum machine and the actual feel we enjoy so much from their performance is actually based upon a multitude of timing anomalies within the performance itself.
The kick drum may be played almost entirely accurately on the beat whereas the snare in relation to that could be either ahead or behind (pushed or pulled – in front or back); and they’re only the accent instruments within the drum kit. The actual time is either played by the hi-hat or the ride cymbal depending upon the style, although any of the kit can be responsible for “subdividing” the time. It is this element that should be the aspect of the performance that is used as a reference for the timing of the track and the consequent tempo of the overall drum part. This is not to say it is incorrect to use the kick drum as a reference as long as the engineer is aware of the feel each individual drummer has and where in the beat she or he prefers to place this instrument.
More often than not I will change the timing reference for the grid depending upon the drummer and the style of the drum part. So importantly, try to recognise where the time is best depicted by the drummer within the drum kit at any given section of the arrangement; and if they change – then so should the reference instrument: hats, ride, floor tom, back to hats, snare for the “marching section”… you get my point I am sure.
Manual Detection vs. Beat Detective
Manual Detection or Beat Detective is a question that I often hear raised when it comes to deciding which technique to use when identifying timing elements from a performance. To better ascertain the choice, let’s remind ourselves of what the software is doing when we use automated tasks.
Peak transients are essentially how all software algorithms locate timing elements contained in the audio once digitised. One can see how accurate (and sometimes not) this is by using the ‘Peak to Transients’ function in your DAW. Why is it that sometimes we can hear a significant peak, even see it, but the software misses it and skips to the next peak? Frankly I don’t actually know, but it is evident when searching in a reverse direction that peaks are located in relation to one another and it appears that at times this is also dependent upon the trigger window – the time between the peaks. If they are very close together one of them may be determined as a peak and the other not. There does not seem to be an absolute consistency in this and that makes perfect sense really, as the audio content is also varied from one full wave-cycle to the next.
In AVID’s Pro Tools this search algorithm cannot be altered by user-defined parameters, in fact I personally don’t know of a software package that does allow this intervention. There are ways of seeing how these peaks are detected though by altering the sensitivity to the amplitude variations, as when utilising the function of Elastic Audio in Pro Tools. When viewing the identification of peak transients within the digitised audio (use Transient Display when an Elastic Audio plugin is active on a track) the operator can adjust the visible detection of peaks. It can be clearly apparent that some of these events are allocated to elements within the audio that do not necessarily represent absolute timing. It is important to accept that at times, the engineer must intervene if the software does not accurately represent what is obviously a significant timing event. Elastic Properties [⌥ 5 Num].
With this understanding, the operator can best determine which method to utilise in order to recognise timing events within the audio. My personal preference is to skip the Beat Detective function and merely use Tab to Transients to recognise these events. It is best to keep an eye on the outcome if human intervention is required, but frankly this is seldom the case with drum tracks and this function consistently yields accurate results. The other reason I avoid the Beat Detective procedure is due to time signature changes and variations in the subdivision of time itself as portrayed by the performer.
Algorithms such as the Detective yield best results when they are informed which subdivision to look for when calculating beat locations, and also need to be informed what the actual length of the targeted audio is in bars and beats. Well, by the time I’ve worked that out, and split any sections that fall outside this filtering parameter setting I can manually determine the timing far better. Importantly, as I am mapping the grid in this manner I am also able to recognise arrangement locations, enter markers, and make note of problematic issues within the performance that I need to address in later editing procedures.
Workflow: Mapping the Grid
- Target the instrument within the performance that best represents the subdivision of time, or in your opinion the most accurate depiction of tempo ie. hi hats
- Instigate Tab to Transient function [⌘ ⌥ TAB]
- Place your Cursor just prior to the event that represents the downbeat of bar 1
- TAB to Transient [TAB]
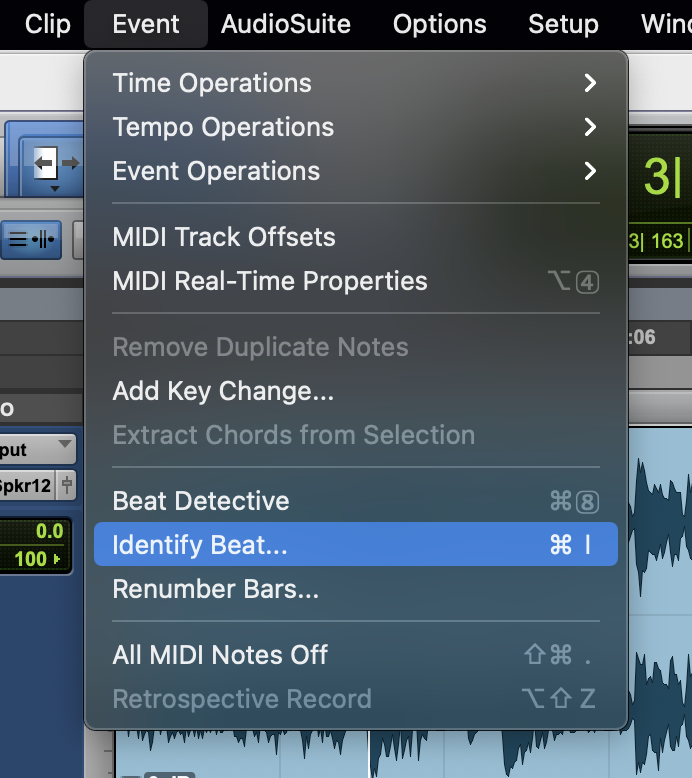
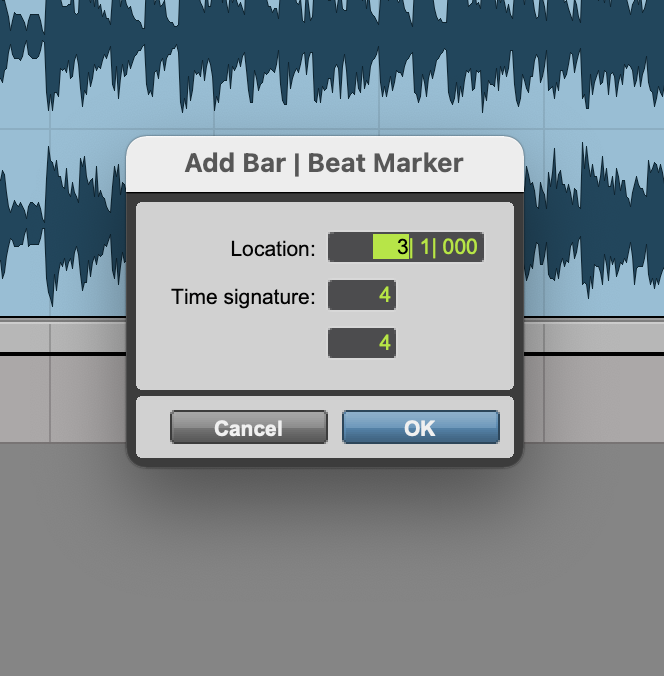
- Identify Beat [⌘ I] – Type 1 into the field followed by Return
- Locate the downbeat of the second bar, placing your cursor just prior to its location.
- TAB to Transient [TAB]
- Identify Beat [⌘ I] – Type 2 into the field followed by Return
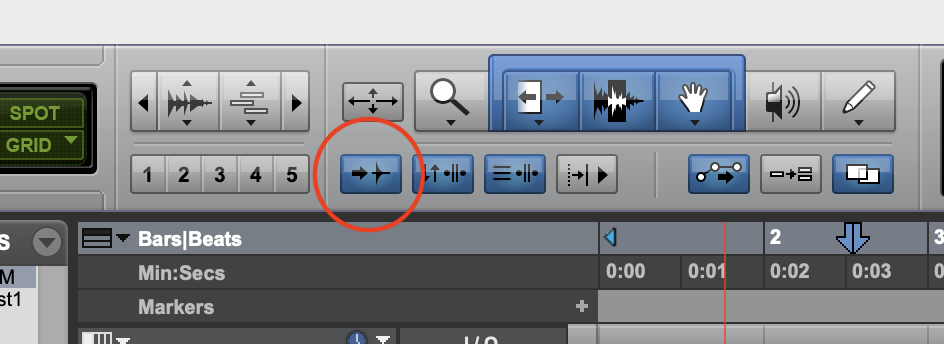
- Set the MODE in Pro Tools to GRID [F4]
- Set the GRID resolution to the subdivision that best depicts the groove of the track.
This has now established a rough estimate of the tempo but I strongly suggest to continue identifying the beats for the entire piece; of course this can now be every four to eight bars depending upon the variation in the recording timing.
NOTE: For true triplet grooves or swing, such as 12/8 the engineer should avoid using a duple time signature such as 4/4. This will require the GRID resolution to be set to Triplets in order to have the grid-lines follow the groove.
Workflow: Markers
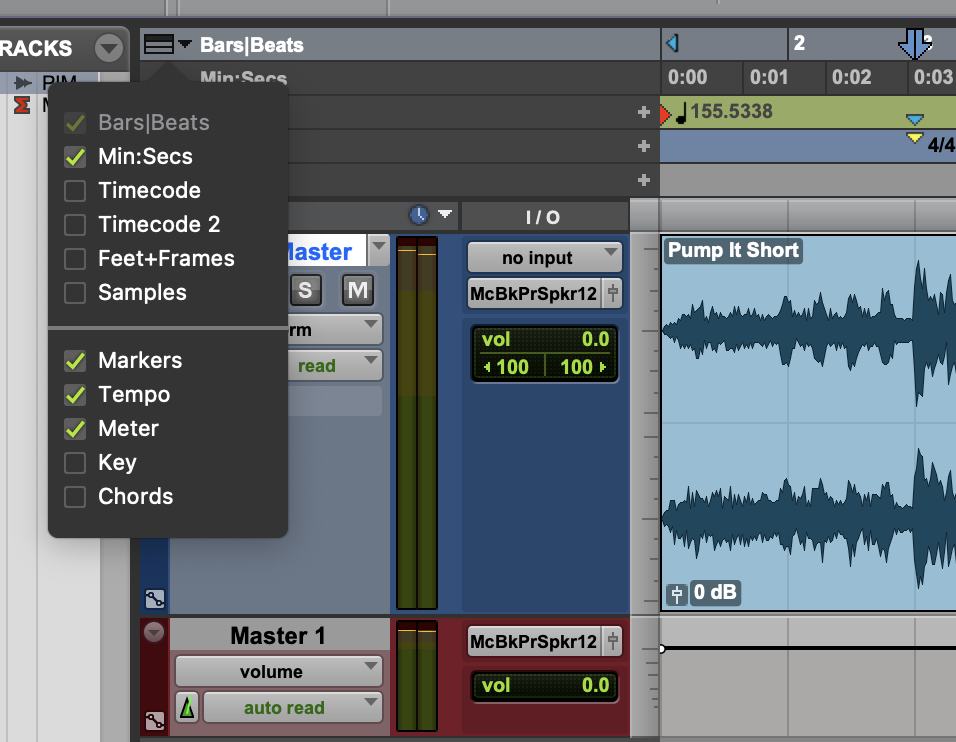
This is a great opportunity to commence marking the major sections of the arrangement, so let’s go back to bar 1 and create a Marker. Two functions here to speed up your navigation throughout the piece:
Go to Bar Command: [= Num] places your cursor in the Transport highlighting the current location. Type “1” followed by Return and you’ll be taken to that location.
Create a Marker (at your current time location): [Enter] **Note: Markers have two states: Absolute and Bar|Beat. For a Marker that will remain fixed to absolute time (the Sample or WORD Clock) use ABSOLUTE. For a Marker that relocate automatically if a Bar or Beat point is changed use BAR|BEAT.
Mapping out both the grid and the arrangement with markers within the same workflow is an excellent method for the engineer to also learn the arrangement.
My suggestion is to now continue playing through the piece, noting whenever the performance takes the peak transients significantly away from the grid-lines. At these points I recommend once again finding a downbeat using Tab to Transient and Identifying Beat in order to pull the Grid back into alignment with the Audio. At arrangement locations such as verses, choruses etc., also create a marker.
Once the grid has been mapped it does not have to be mapped again, although it can be fine-tuned if required. With this done there is no faster and more accurate way to edit, correct, and eventually mix your project.

This excerpt on Mapping the Grid in Pro Tools is from: Anthony “ToK” Norris – Editing Techniques. Available at the ToKwerX.