There’s something to be said for learning your room, as a mathematically ‘flat’ room isn’t ideal for making music, let alone comfortable for a band to produce a masterpiece with you at the helm!
Acoustic treatment can be as complicated or simple as you want it to be. What is important though, is that you’re making music in a space that allows you to (as clearly as possible) hear and feel what you’re doing with reasonable accuracy. Analysing your room helps you to understand how, why and where to treat it, instead of blindly buying or building acoustic treatment.
Acoustic treatment basics
Learning to produce, mix and master audio had me so focused on FET mics, VCA compressors and tube EQs, whether they be analogue or digital, my use of them surely being the secret sauce to whatever success I might see one day. All the while, the advice I was receiving from mentors and educators was all about monitoring, and they were right. The best analogue gear is all in vain if you can’t accurately hear its effect on the music. While it’s rare to have the opportunity to build a room from the ground up, there’s a lot of things we can do to help treat our listening space a little bit.
Read up on all the latest features and columns here.
The 1/4” wavelength rule
Let’s start with a little math. Treating a room for good acoustics is about controlling the soundwaves within the room, and preventing them from clouding the direct sound from your speakers to your ears.
Every frequency requires physical space to complete a full cycle. Humans can hear from approx. 20Hz to 20kHz, 20Hz requiring approximately 17m to complete a full cycle, while 20kHz requires only 17mm to complete a full cycle. The problem is that if your room is, say 4-5m deep, those frequency will be bouncing off the back wall at irregular intervals depending on where they’re at in the physical wave cycle. This means the reflections will be arriving at your ears at a different time and affecting the summed sound that arrives at your ears. In extreme (though not uncommon) cases, sounds can reflect back at your ears out of phase with the direct signal, ultimately nulling the sound you hear.
To figure out the physical wavelength of a sound wave, you can use the following:
S ÷ F = W
Where S = Speed of sound, F = Frequency (Hz) and W = Physical wavelength.
So, as an example, if we’re figuring out the length of a 100Hz soundwave, we’d use:
343 (speed of sound @ 20C) ÷ 100 (the frequency) = 3.43m physical wavelength
There’s also a handy calculator here. Great, so we can figure out how much physical space a soundwave needs to complete a full circle, let’s move on.
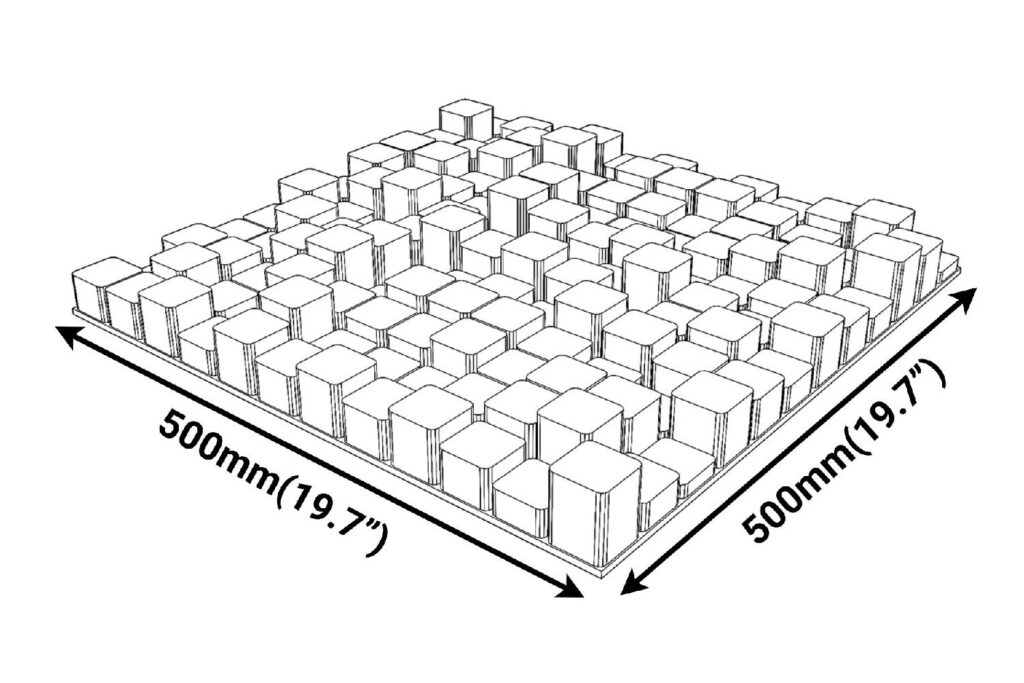
One way to more effectively treat the acoustics of a room is to absorb the sound waves as they hit surfaces instead of allowing them to ricochet off the hard surfaces and bounce around. This is where our math comes in handy, because as a general rule of thumb your absorption needs to be ¼ as deep as the frequency you’re trying to absorb, or conversely, your acoustic treatment will only absorb frequencies at above their depth.
Continuing with our 100Hz example as a nice round number, we worked out that 100Hz needs 3.43m to complete a cycle, so ¼ of that (approx. 85cm) of absorption is required to effectively absorb 100Hz. Our immediate problem, is that 80~cm of absorption quickly takes up a lot of space in our room, especially when it’s covering (ideally) most walls in our studio. What about 50Hz? That requires approx. 1.7m of absorptive material depth to be effective. We’re quickly running out of space to tackle the low frequencies! This is why for low-end, moving and planning your listening position might be the best bet.
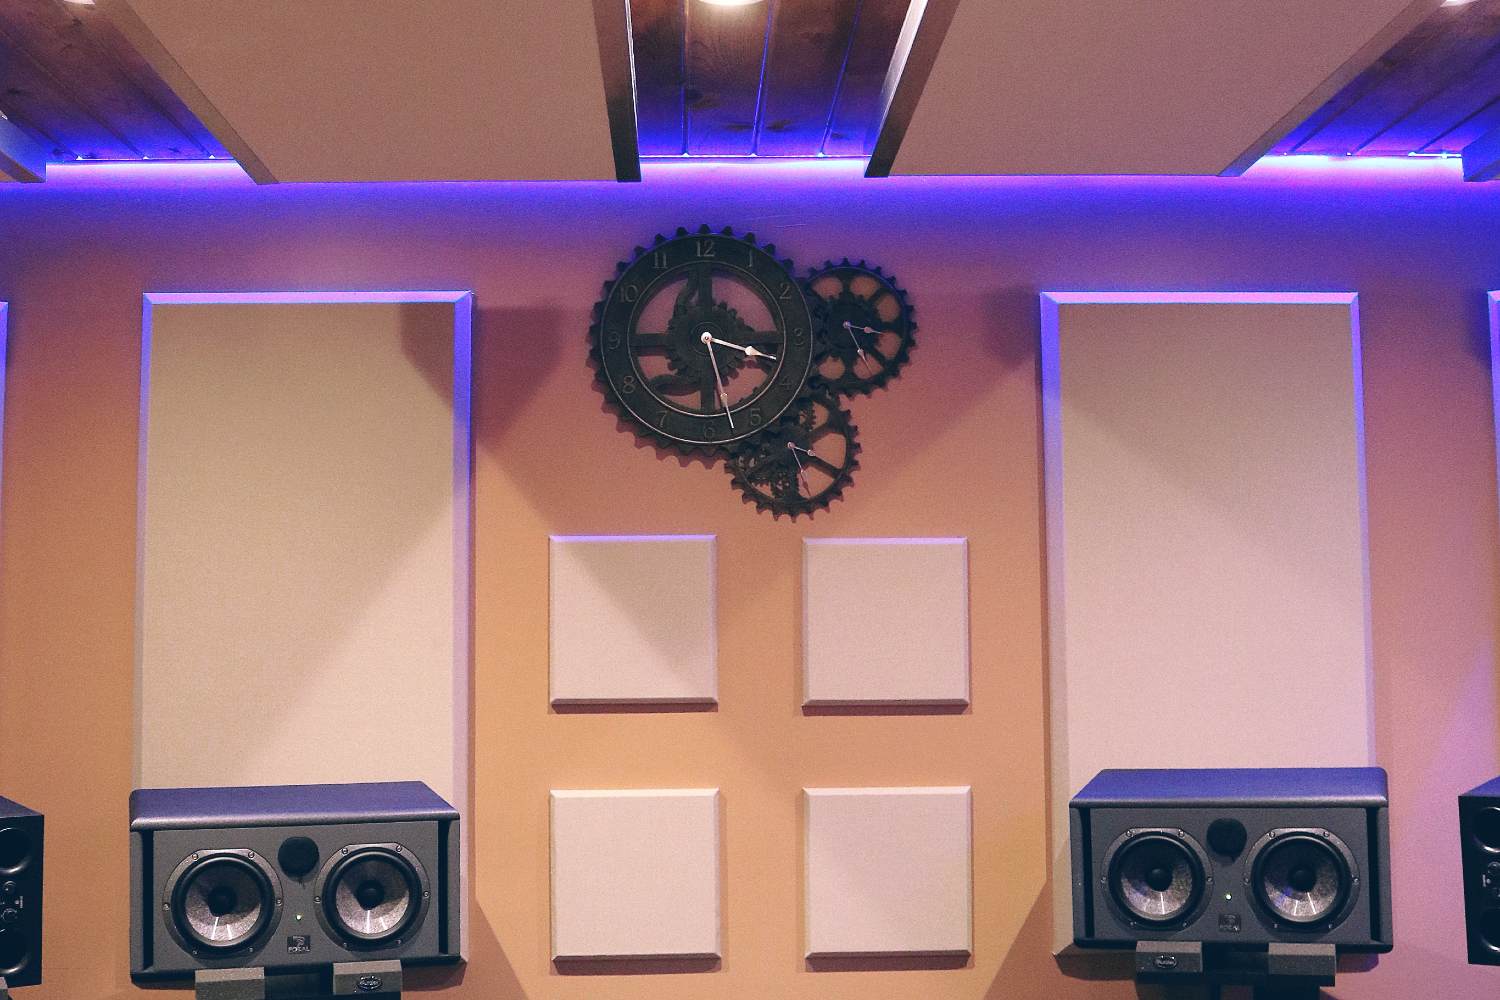
Acoustic panels, depending on what area of the frequency spectrum you’re trying to treat are great for low mid and high frequency control. Bass traps (big, deep panels of absorptive material) work great in the corner, for two reasons: low end builds up in corners, as well as the right angle of a corner allows for more depth without being as acutely in-the-way as deep panels on your walls.

Moving your studio monitors
We understand that properly treating a room for the low end can be really inconvenient and difficult unless you’re building a room from scratch. The problem is the way the soundwaves bounce around room – so a simple solution is to reposition yourself or your speakers so that the low end isn’t bouncing back in a detrimental way.
While positioning your speakers close to a back wall generally isn’t advised, it can also help low end to build up if it’s really lacking in your space, and this can sometimes be a good fix. The same goes for speakers on a desktop or meter bridge instead of speaker stands, the desk resonating (usually 60-100Hz) and adding low end rumble to the listening position
Moving your speakers can change where and how sound fires from them, and therefore where it hits the walls, ceiling and back wall, therefore changing the place in the wave cycle that it arrives back to you. Sorting your low end organically allows you the freedom to use shallower panels to absorb more high and mid energy on some special spots: the first reflection points.
First reflections
A ‘first reflection’ refers to the places (other than your ears) that sound hits before bouncing back to your ears. This usually refers to the side walls between you and your speakers, and the ceiling. Special mention must go to the floor, a generally reflective place but almost impossible to treat properly!
When playing sound from your speakers, the sound splays out in just about every direction, including the back wall that we’ve already discussed.
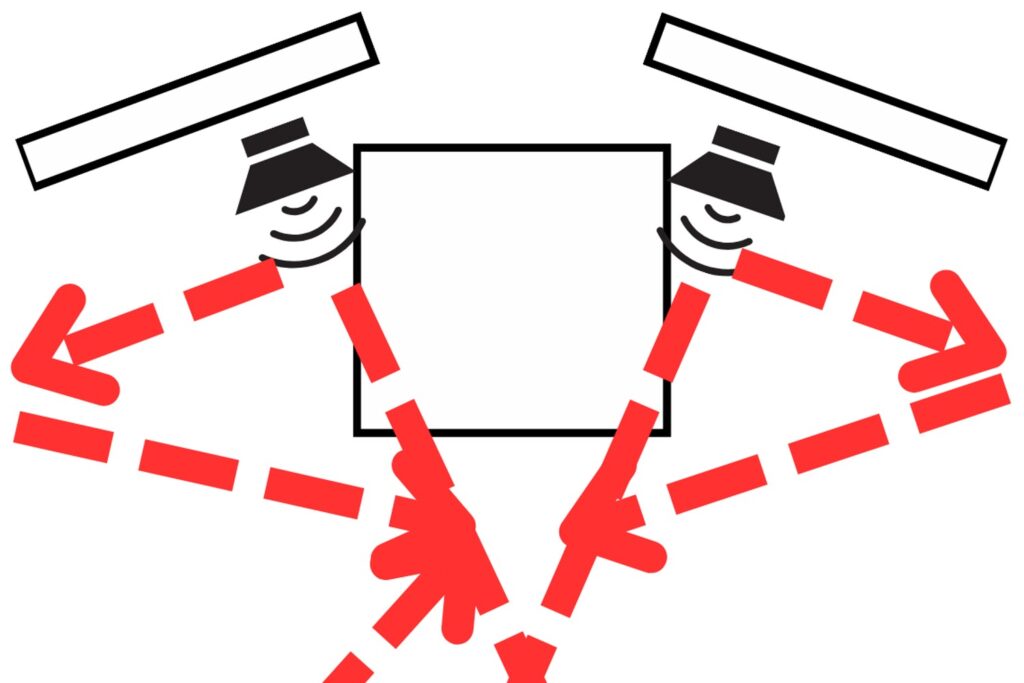
This means that the wall either side of you are receiving sound from the speakers, and that’s bouncing back to your ears just after the direct sound arrives. This applies to the ceiling as well, usually just above your listening position. All of this smears the stereo image, affecting the stereo placement of sounds, while also affecting the frequencies you’re hearing.
You can easily locate first reflection points by using a small hand mirror flat to the wall. Best done with someone to help you, sit in your listening position and slowly move the mirror across the wall, marking the points on the wall where you can see each speakers (i.e. there’ll be two spots you’re marking on each wall). Do this for both walls to the left and right of you. These points are your first reflections and will require treatment to prevent the full strength of the soundwaves bouncing back at you. Either absorption or diffusion can be placed here, either with gobos (rolling acoustic panels, great for rentals!) or affixed to the wall.
Sound diffusion
We’ve talked about absorption, but diffusion is another conversation when it comes to acoustic treatment. Diffusion, at its core, works by breaking up sound instead of absorbing it, the sound splaying off with less energy than when it arrived due to their inconsistent surface, and preventing it from bouncing back to you with too much power, as opposed to absorbing it. There’s various diffusion designs for this acoustic treatment, but they generally adhere to either 1D or 2D designs, i.e. splaying the sound across one dimension (1D, only up and down or only left and right) or across two dimensions, splaying up and down, left and right simultaneously. A primitive root diffuser (colloquially known as a ‘Skyline’ diffuser), for example, splays sound out in two dimensions.
Room EQ Wizard REW software
Okay, so we’ve got a basic understanding of how and where to begin treating sound. But what frequencies should we be treating in our room specifically?
This is where some tech comes in. Room EQ Wizard (REW) is a free software (you can donate once you realise how handy it is!) used to measure your room. For this, we’d ideally use a dedicated measurement microphone, though if the budget is tight, just about any reasonably flat dynamic microphone will work (think Shure SM58, SM57 etc.). For those interested, the Behringer ECM8000 Measurement Microphone work remarkably well for acoustic guitar and other treble-y sources like hi-hat, ride cymbals and even rooms. I bought a pair!
Amongst other things, REW will help us measure the frequency response, phase and reverb time of our room. I’ll let you to get to grips with calibrating REW (you can create profiles of your interface to remove the ‘sound’ of your convertors for a more controlled measurement, as well as a place to upload calibration files of microphones for the same reason), but after performing a measurement, you’ll be presented with the results. Position the microphone just behind where your head will be when working, and mark the spot as best you can!
First and foremost after a measurement you’ll see the frequency response graph… and it’ll probably look terrifying. It’s a good idea to set some ‘smoothing’ to help you see the results, ironically, more accurately. The un-smoothed graph will be filled with extreme peaks, spikes, dips and troughs that don’t really reflect what we’re actually hearing. Smoothing to ⅙ is a good start!
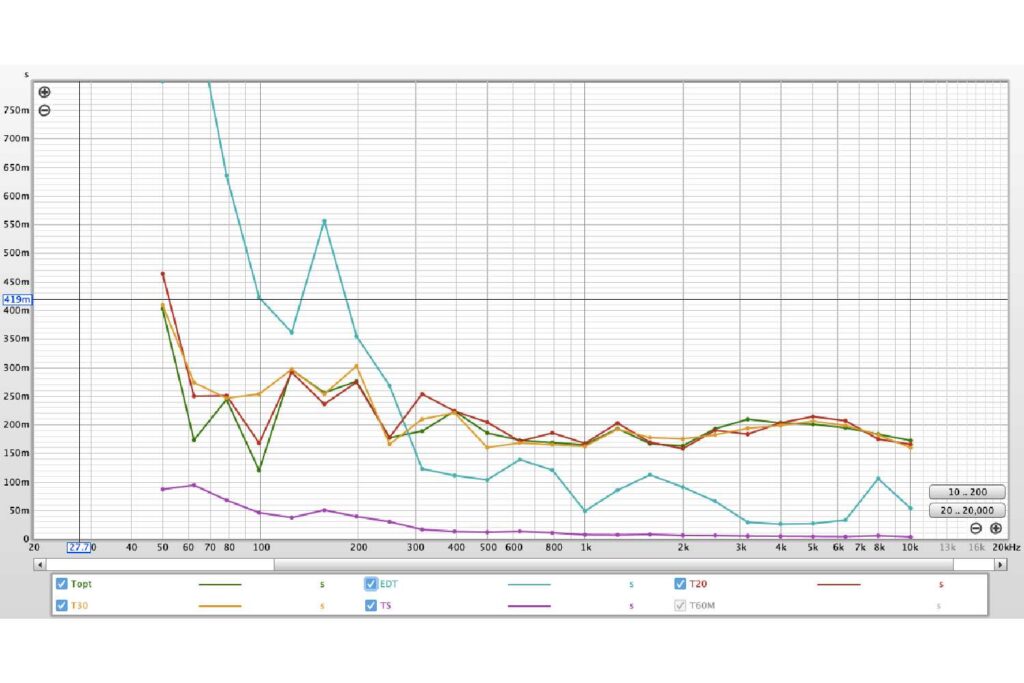
Jumping across to the REW’s RT60 tab, you can see the reverb time across the entire frequency response graph. RT60 refers to how long it takes for a frequency to reduce by 60dB after the source has stopped. Alternatively, you can also choose to view measurements of RT20 (the same concept but 20dB reduction), as this can help to pinpoint problem areas. 60dB reduction is a lot and can sometimes display an unnecessary amount of info.
More absorbative acoustic treatment will help to reduce your reverb time. Reverb in a room isn’t necessarily a bad thing, it’s just best practice to make sure your reverb time is even across the board. It’s not uncommon for low frequencies to reverberate and resonate longer than higher frequencies. Your RT60 can also indicate if your room is too dead, i.e. if you have too much absorptive material, and in this case diffusion or some more hard, reflective surfaces might actually do you good!
Finally for REW, we can measure phase to help identify why and where there might be nulls and problems in your room. REW allows you to measure one speaker at a time, so we can check how in (or out) of phase your speakers are within the room.
Leave the measurement microphone in the same spot as your initial measurement, but this time when you run the measurement, select one speaker at a time. This way, using REW’s ‘Overlays’ option to display all measurements on one graph, you can see how the phase of your speakers compare with each other. Lots of criss-crossing lines means the speakers are criss-crossing in and out of phase with each other, and will most likely begin to match up with any dips in your frequency response graph.
Again, repositioning speakers can easily shift the phase relationship of your speakers, before any absorption and diffusion takes place!
Thinking about your studio equipment and furniture
Finally, it’s important to think about the furniture in your room, as this all plays a part in the sound of your acoustic treatment. A couch? About a metre deep and filled with absorptive cushioning? Great for assisting with low end. Windows? Very reflective. A mixing console? Both reflective and a diffuser, though unfortunately positioned to perfectly bounce sound right at your face and ears.
It’s impossible to avoid flat surfaces like desks, studio racks and doors, but you can think about the placement of furniture and if you’re going to cop reflections, try to make them symmetrical. World class mixing engineers like Jesse Ray Ernster have battled this, intending to remove as much reflection as possible, not entirely unlike an anechoic chamber, which are designed for scientific testing of sound.
The position of your studio desk can prevent sound from bouncing directly back at you, i.e. positioned in a corner, though this might prevent the chance to add absorption in that corner you’re occupying.
Understanding this is all important to help you understand measurements of your room, the graphs and other info ultimately helping you to place acoustic treatment in an optimal place! All of this is to help you begin treating your room, for whatever it needs, but without shooting in the dark by buying or building panels that yon don’t need.
Good luck, measure twice & cut once, and happy mixing!
For some great tips on building your own panels, visit the ADAM Audio YouTube channel.