The ultimate guide to avoiding phase cancelling to ensure your drum recordings are as phat, focused, cohesive, and punchy as possible
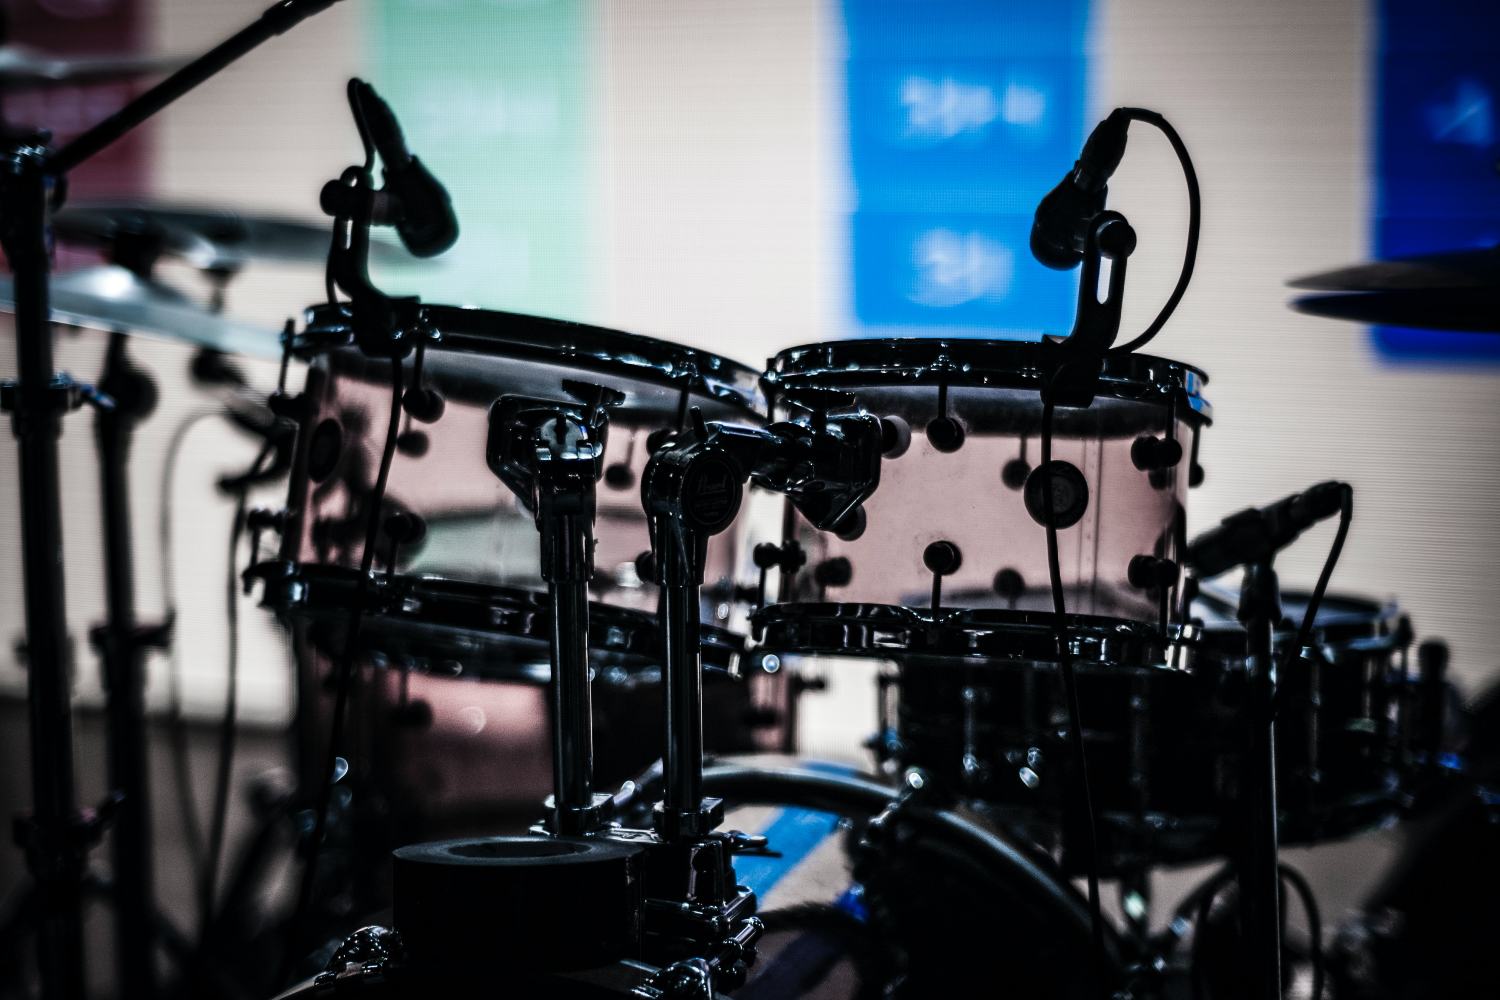
A great live drum recording and the phase relationship of each microphone is becoming somewhat of a lost art form, with many current productions opting for dropping in loops and/or exploring the wealth of sample libraries available for beat-making in the current era of music production.
Summary:
- Phase refers to a specific position (degrees) or place (time) in relation to a waveform.
- The second we introduce more than one microphone to record a sound source we introduce phase issues, perfection doesn’t exist, there’s always going to be some level of phase cancellation.
- If you can get it right in the recording process and become your own master of drum recording, then you are already halfway to producing unique, distinctive drum sounds.
Read all the latest features, columns and more here.
However, if executed well, a live drum recording is still just so hard to beat (badumcha), often becoming the definitive timbral backbone of a record. But what exactly makes a great drum recording? The drummer? Absolutely. The instrument? Arguably yes, but in truth, a great player should be able to make any instrument sound better than it should. For those reading this article who perhaps struggle to get their drum recordings to sound phat, focused, cohesive, and punchy, I’m here to tell you it ordinarily boils down to being a far simpler matter than you might imagine. Let’s talk about phase.
What the phase?
Without wanting to get too bogged down in the technical details, we’re going to quickly break down what phase means in relation to sound, so bear with me here, understanding this basic concept is vitally important, particularly in relation to drum recording.
As I’m sure we all understand, sound travels through the air in waves, aka soundwaves. These waves can be measured by frequency (Hz) and amplitude (positive and negative). A complete wave cycle is 360-degrees.
Taking a simple sine wave as an example (see image 1 below), its wave cycle starts at zero amplitude (0-degrees), rises to a positive amplitude (90-degrees), back down to zero (180-degrees), falls to negative amplitude (270-degrees) and goes back up to zero amplitude (360-degrees). The amount of times this occurs per second determines the frequency in Hertz. For example, a frequency of 60Hz means that frequency completes its full 360-degree cycle 60 times per second.
The words phase and polarity are often used interchangeably in the audio world, but there are important distinctions between the two which should be briefly explained here.
Phase refers to a specific position (degrees) or place (time) in relation to a waveform. Polarity relates to either the positive or negative state of a wave cycle. It’s for this reason that the term “flip the phase” can be so confusing, as when this button is pressed on a mixing console or microphone preamp, it is actually flipping the polarity from positive to negative or visa versa, but is often confusingly referred to as being flipped 180-degrees out of phase. Potato, potahto. I think not, but I digress.
If we take our perfect sine wave from image 1 below, duplicate it and then flip the polarity of one of the duplicated wave, we get image 2. The first sine wave goes up in amplitude (positive), whilst the second sine wave goes down (negative) in amplitude. The end result being complete cancellation, or deafening silence.
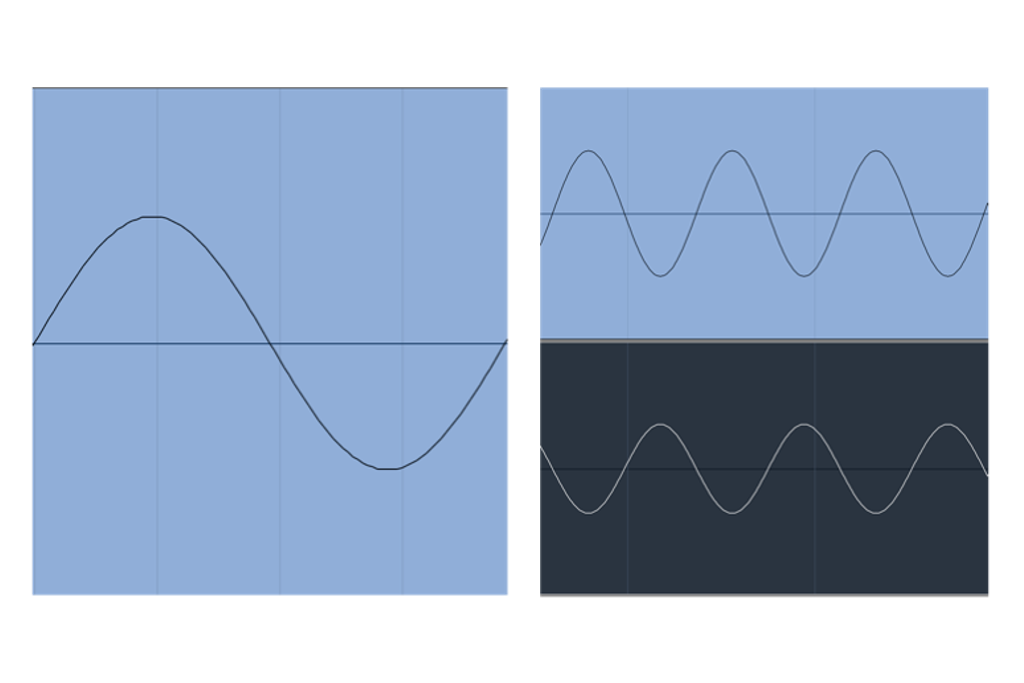 (Left: Image 1, Right: Image 2)
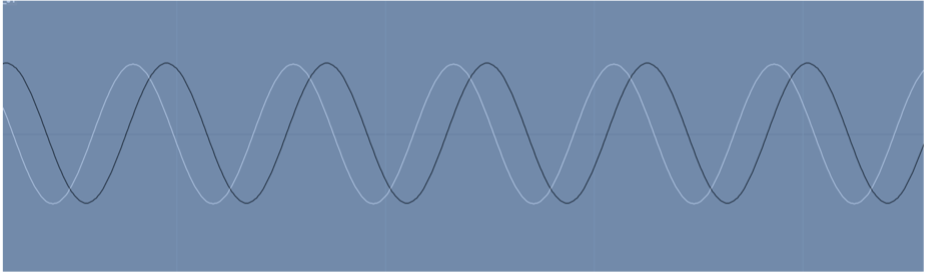
If we then take our original sine wave and add in our second sine wave next to it, the time (or delay) between them represents the phase shift between the two waves, as shown in image 3.
Mic it up
Now that we’ve covered the important details of what phase and polarity are, let’s now look at how this relates to recording drums and how valuable this understanding becomes.
As I’m sure most of us are aware, drum recordings typically employ the use of more than one microphone. The second we introduce more than one microphone to record a sound source we introduce phase issues, hurray! But fear not, as thankfully attaining the “holy grail of phase perfection”, simply doesn’t exist, there’s always going to be some level of phase cancellation. What we can do though is try to get our microphones as closely in phase with each other as possible; helping reinforce the sounds we want, and minimising the sounds we don’t. Let’s start by looking at how we would typically mic up a snare drum.
Most often, two microphones will be positioned in close to the snare drum. One on top, aimed down at the top (batter) head of the drum to capture the stick attack, tone, and body of the drum, and another mic underneath, pointing up at the bottom (resonant) head, capturing the sizzle and snap of the snare wires. Simple enough right? Sure, however, due to the very positioning of the mics (one facing down, the other facing up) there will be a varying degree of phase cancellation as they point in the opposite directions (think positive and negative polarity). This also introduces inherent phase problems due to the proximity of the stick hitting the top drum head (the top mic being closer) and how the drum head physically flexes to being struck; with an initial downward directed pressure of the drumhead, which then releases back upwards.
To help bring these two microphones into better ‘phase alignment’, we’ll typically try flipping the polarity or phase of one of the microphones. Although this 180-degree flip won’t technically change the time of arrival of sound reaching the two mics (but instead only changing the polarity of positive or negative), this change will usually bring the mics into the same polarity with one another, giving a reinforcement in gain (or amplitude), as opposed to cancellation. As the waveform of a snare drum hit is far more harmonically complex than that of the sine wave examples, as well as the distance between the mics themselves, the phase won’t be perfect but their polarity should be far more in-sync with this simple flick of a switch.
Critical listening
While our multi mic’d snare drum example above gives us a nice clear picture of a single drum with mics positioned top and bottom, things start to get a little more phase-y when we introduce other close mics around the kit, as well as others positioned further away, such as room mics. Typically, we’ll have a couple of kick drum mics (usually one positioned inside and one outside), a stereo pair of overheads, some tom mics and the aforementioned room mics just for good measure. A great place to start is by breaking mics down into pairs, eg kicks, snares, overheads, and rooms and get a cohesive understanding of the phase relationship between each pair before jumping onto how they interact with the others.
Let’s take our stereo overheads. Starting off in mono (both mics centre panned, as this significantly helps with discerning phase issues) have the drummer play a beat. A quick note, if your microphone preamps or mixing console don’t have a polarity switch, simply record a snippet into DAW land, then use any plugin with a polarity switch to assess playback from there. Just listening to our centre-panned overheads, flip the polarity of one microphone, paying particular attention to the low end. Try focusing on the sound of either the kick or snare drum and listen to if it becomes fuller or thinner sounding. If you hear the low end become thinner or hollow when one of the mics has its polarity flipped, it means each microphone are in a good phase relationship with each other and the mic can be flipped back in phase, or un-invert the polarity of one of the mics.
If zoomed in on the recorded waveforms in a DAW, this should be visually quite obvious and particularly easy to discern on a sharp transient peak of a snare drum hit. Both the waveforms should be going in the same direction as each other (remember this example means the mics as they are recorded are in a good phase relationship with each other and sound worse when one mic’s polarity is flipped).
If, however the low end becomes fuller or more reinforced, the microphones in their current positions are not in phase with each other. In this case a couple of things can be done. The polarity flipped on one the microphones can be left as is, if this sounds satisfying. Otherwise, moving each microphone slightly (further or closer apart for example), then repeating the exercise again can yield more pleasing results, we’re aiming for overhead nirvana here.
I would typically opt for moving the microphones first, as I like to keep overhead mics in the same polarity position if at all possible. The reason being is it tends to make things easier when assessing the phase relationship with the other mics around the kit later.
While the polarity flip might not solve everything, it’s a sure and fast way of discerning how in or out of phase a pair of microphones are with each other; literally with the push of a button. And if still not completely satisfied, keep moving those microphones around to different positions until you find what sounds good to you. Trust your ears.
Creative decisions
As more microphones are introduced and listened to, exercising the principles from the overhead example above will quickly help distinguish the phase relationship between the various microphones. Try soloing up certain mics together, such as the two kick mics and snare mics and flipping the polarity on each “pair” of mics to see what sounds more or less appealing. Recognising if the low end sounds fuller or thinner generally helps give the most obvious picture and is the scenario in which we hear phase most obviously, but also pay attention to what other things come into or out of focus. Absolutely, this process does indeed require dedicated time, experimentation and critical listening to become more familiar to what these phase issues sound like, but with practice, it will become second nature.
It’s at these points, with a discerning ear, that creative and sonic decisions can be made as opposed to merely being concerned with what’s right or wrong in the technical sense. This in essence is what makes recording drums with multiple mics so incredibly satisfying. Simple checks such as the polarity flip or simply moving mics a couple of inches can dramatically change the sonic characteristics of what’s recorded. Knowing what to listen for when it comes to phase and polarity only helps inform these creative decisions, and with experience, the whole process becomes that much more enticing and enjoyable.
While there are numerous tools available to help refine and tweak phase issues in the mix (far more than to cover in this article alone), if you can get it right in the recording process and become your own master of drum recording, then you are already halfway to producing unique, distinctive drum sounds. Sounds that you’ll never find in any sample pack.
Check out Chris Lord-Alge’s masterclass on tracking live drums here.