An in-depth walkthrough of Recording, Comping and Quantizing drum tracks.
Since the launch of Live 11, audio editing has received a large bump in audio functionality, for a traditionally MIDI/Sample heavy software. From track linking to multiple track lanes, the new Ableton Live 11 is hot on the heels of some of the more traditional, linear DAWs when it come to drum editing and multi track workflows. In aid of this, we thought it was a perfect time to go through some of these new features and how to implement them into your production repertoire.
What you will learn:
- How to prepare your session to record multiple drum takes.
- Comp the best drum performance from your recorded audio.
- Keep everything in line with the grid via quantization.
Read all the latest features, columns and more here.
Recording
Getting multiple takes from a drummer is absolutely essential to ensure you record the best performance. Sometimes, however, the best take features a section that is sub par compared to the rest of the recorded audio. If it was the ‘70s, you’d just do another take until you got the perfect one on tape, but now, there are other options at your disposal.
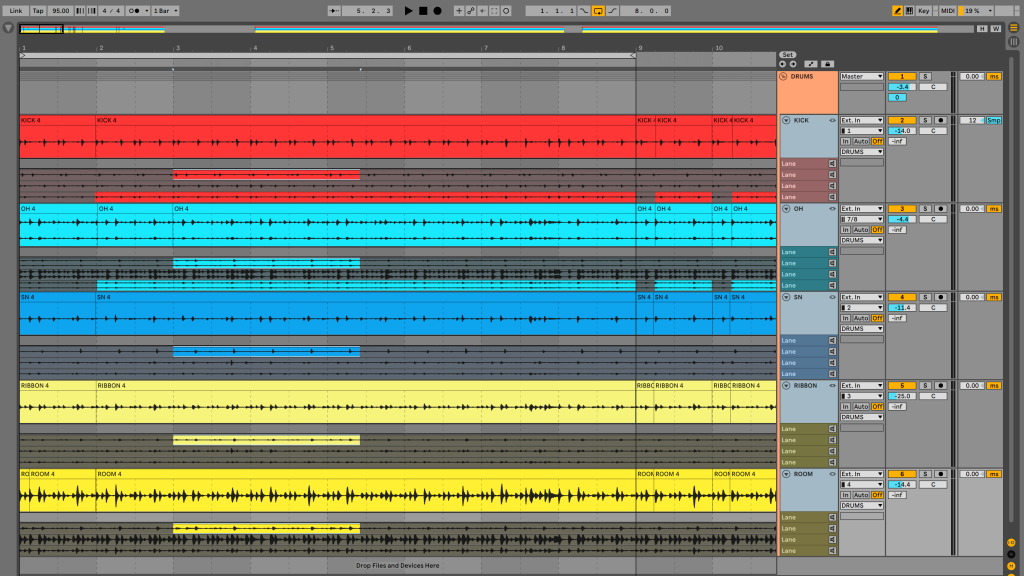
Using the record function on Ableton 11, you can record your first take as normal. You’ll now have to link your tracks by selecting then right clicking on the channels and choosing link tracks. After this, right click again to show take lanes your drum channels and use the shortcut SHIFT+OPTION+T to create a track lane for each channel. Drag your audio down onto the track lane, and you’re ready to go.
From now on, all audio recorded on your main track will create a new track lane for each pass. This lane stores the audio from the specific takes which can be edited later once you’ve finished recording.
Using the loop functionality, track lanes will be automatically created and recorded, so you can ignore the past couple steps if taking this route.
Comping
So, you’ve got your recording all wrapped and you’d like to splice together the best takes to make your drummer feel – and sound – like a star. It’s important to think of phase alignment while editing drums as all of your microphones pick up the whole kit. Even the kick mic that is inside a ported bass drum will pick up some rumbling of the hi hats and cymbals. As a general rule of thumb, if you’re going to replace a section because the snare drum is a little out of the pocket, you should replace the whole take with another to maintain phase coherency.
So, while you have all drum channels still linked, using the pencil tool is a great way to get parts you know are the best on the main channel. Enabling the pencil tool (B on your keyboard) while having track lanes open allows you to select a portion of audio from a take lane and it will automatically copy it to the main channel. Using this with the snap to grid feature will help you get the drum hits comped quick.
For fine editing and listening to your separate takes, you’ll want to use the regular cursor and some keyboard shortcuts to get you moving. Selecting a portion of a track lane you want to audition and pressing T on your keyboard will enable that track to take priority over the main channel when you press play. To audition other takes, simply press DOWN or UP and T again to select that track. Simple.
Now that you’ve found a replacement for the mess up on the great take, simply press ENTER. Ableton will move your selection to the main track lane and add crossfades automatically. In most instances it’s less obvious to listeners when you’re changing takes to edit based on kick or snare drum hits.
For an even more in depth edit, unlinking your drum tracks and individually moving the cross points to where the snare falls on each track will provide a fantastic sounding edit in a lot of cases.
Quantization
Many modern records contain quantization as our ears have become extremely used to the perfect 4/4 kick drum beat of dance music. With Live 11, quantizing drums is an efficient process for creating consistent beats that fall on the grid.
Again, we’ll be utilising the track linking function for this, and the first thing to do is consolidate all the audio cuts we did in the last section. It’s important that all clips you quantize are of the same length, as creating warp markers might alter the audio in a non consistent fashion. Now while playing the track (if not recorded to a click track) use the tap tempo function while your track is playing and it will change the grid to better represent your drum recordings.
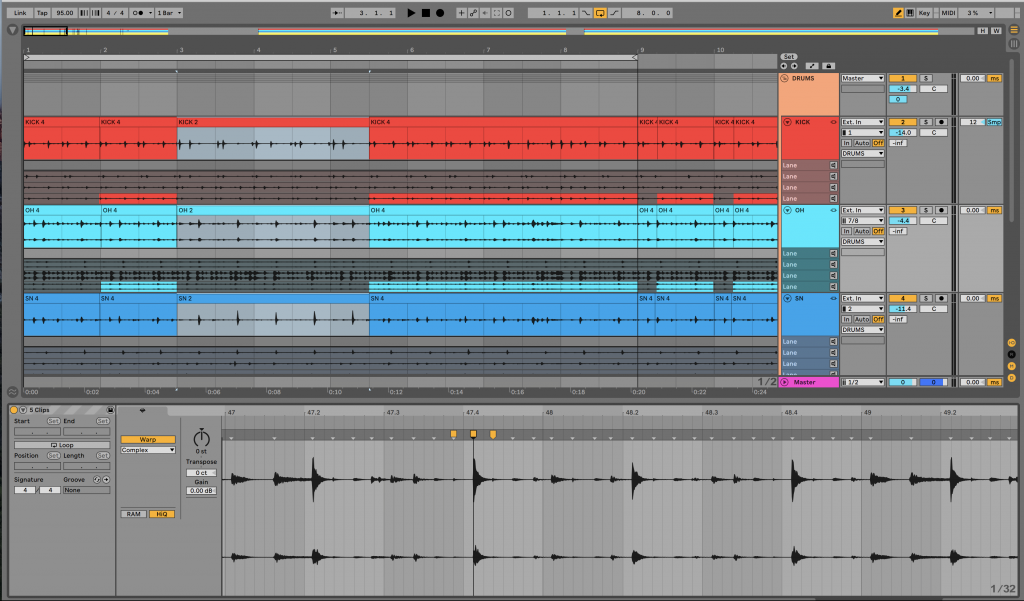
Once that’s done, we can double click on any of our channels and the clip view will pop up. In most cases I’d select the kick for mapping to the grid. Using the warp functionality on beats mode (because drums are beats obviously), we can inspect which parts we’d like to edit. Ableton will automatically detect transients represented by greyed out markers just below the grid divisions. With these transients already identified, we can get to quantizing!
While aligning out of time drums it’s important to create warp markers around the section that you will be quantizing. Without doing this, the whole track will stretch and shrink based on each edit which is not ideal. You can create a warp marker by double clicking on the aforementioned markers or anywhere along that section of clip view. Now the section is outlined, get your transients on the beat.
I find it sounds more natural when using quantization over a bar or two bars as opposed to every single transient. You might end up with a drum track that sounds like a robot if you do this and it’s best to let the drummers feel ring through. If you’re displeased with any of your quantizations, select the portion you’d like to get rid of in the clip view and press delete. Simple.
With all this information I hope you can get your drum tracks sounding clean and in time with ease. These new features of Live 11 make the process of drum editing more intuitive and are a huge time save from previous iterations and put them further in the forefront of digital audio workstations.
Head to Ableton’s website to find out more about Live 11.